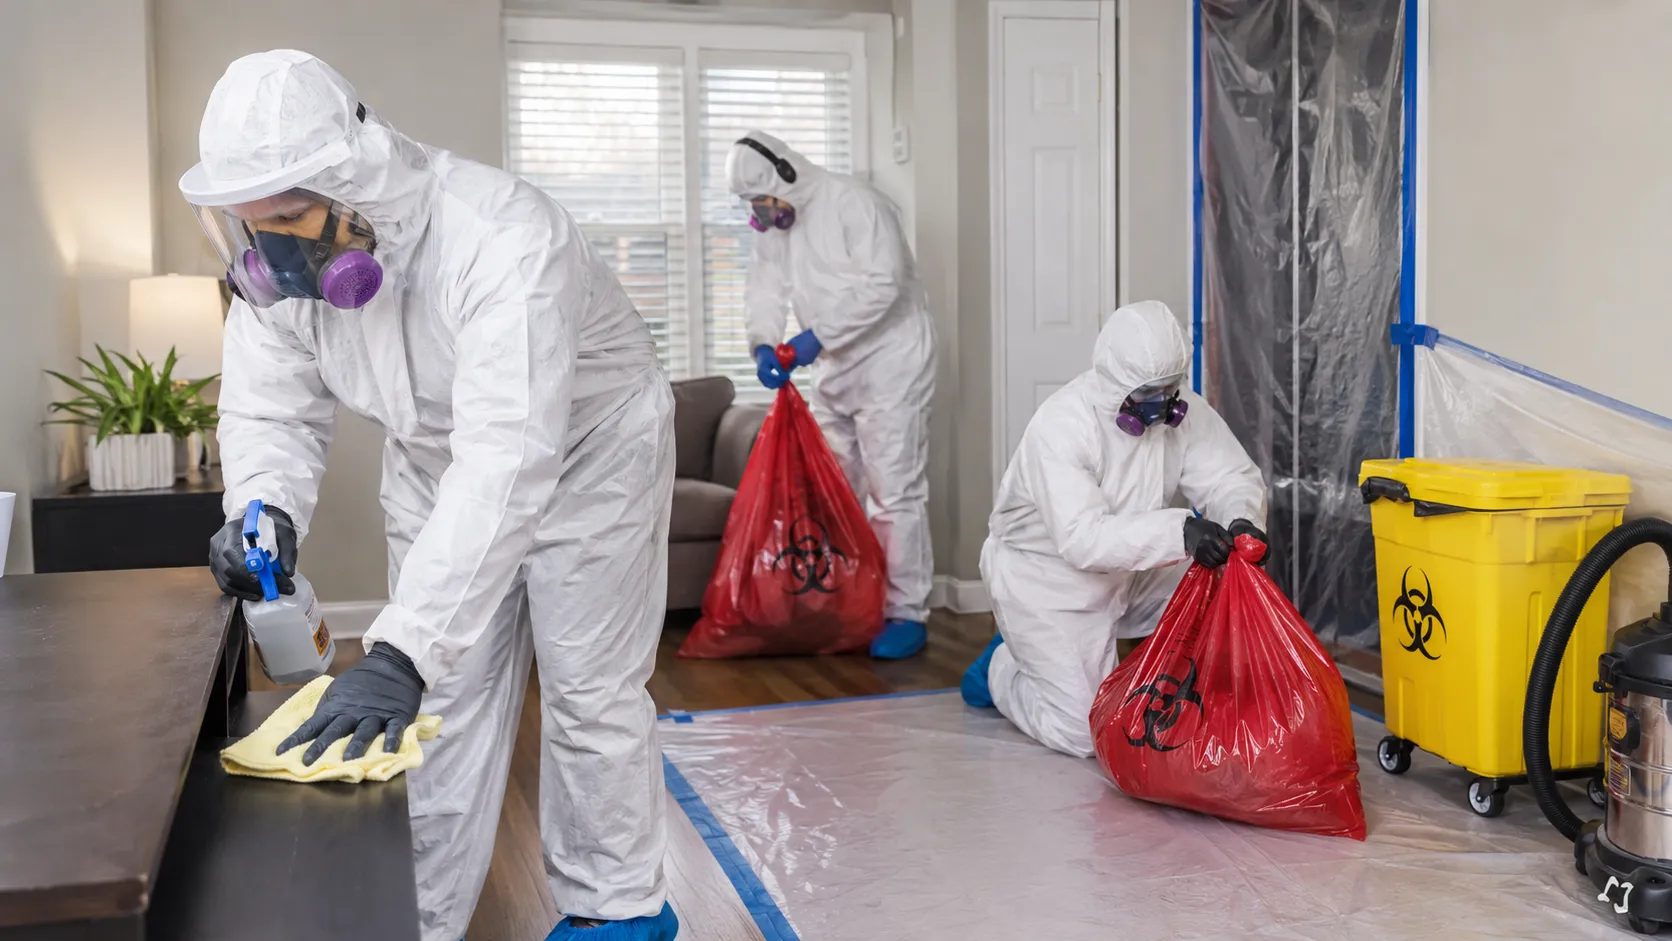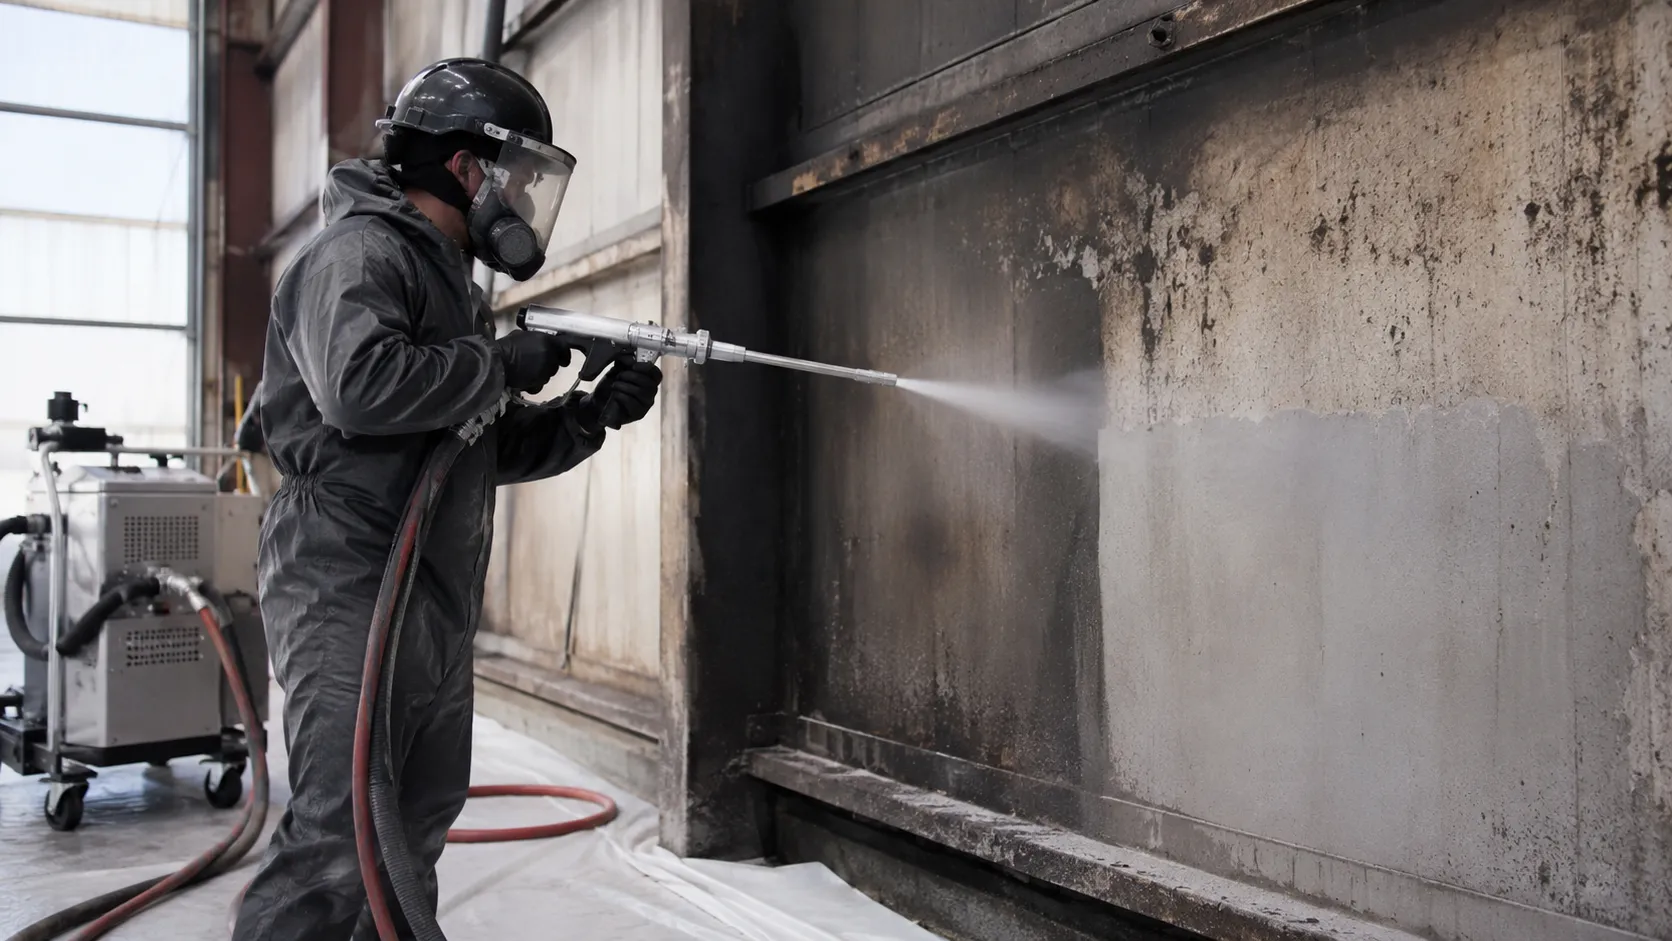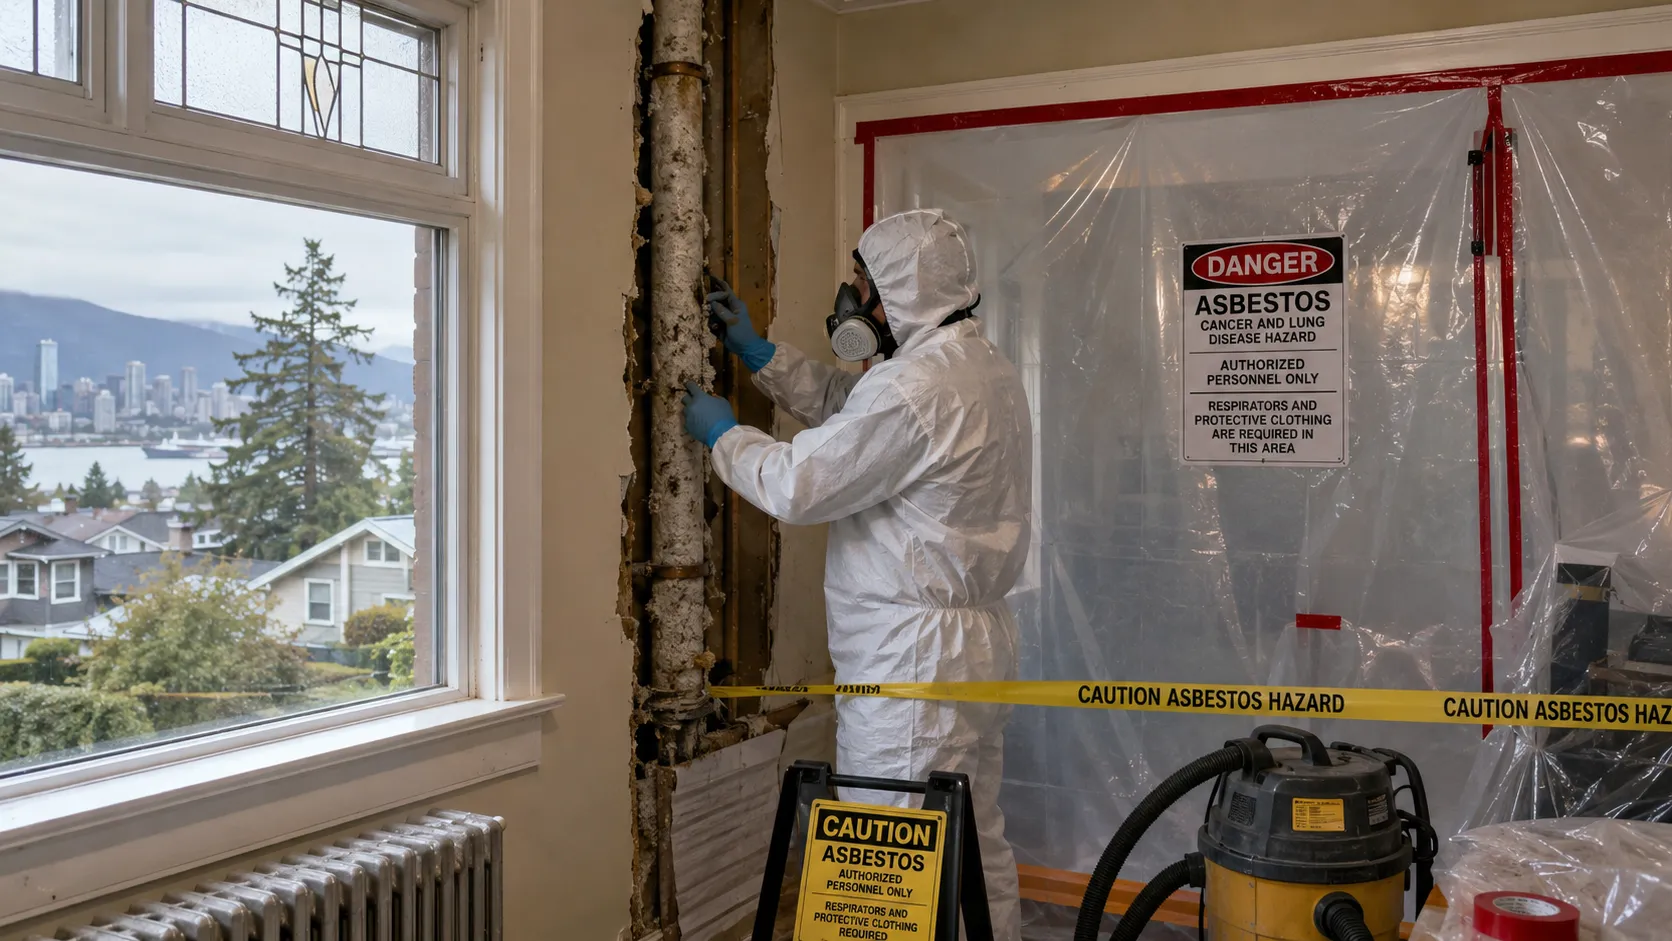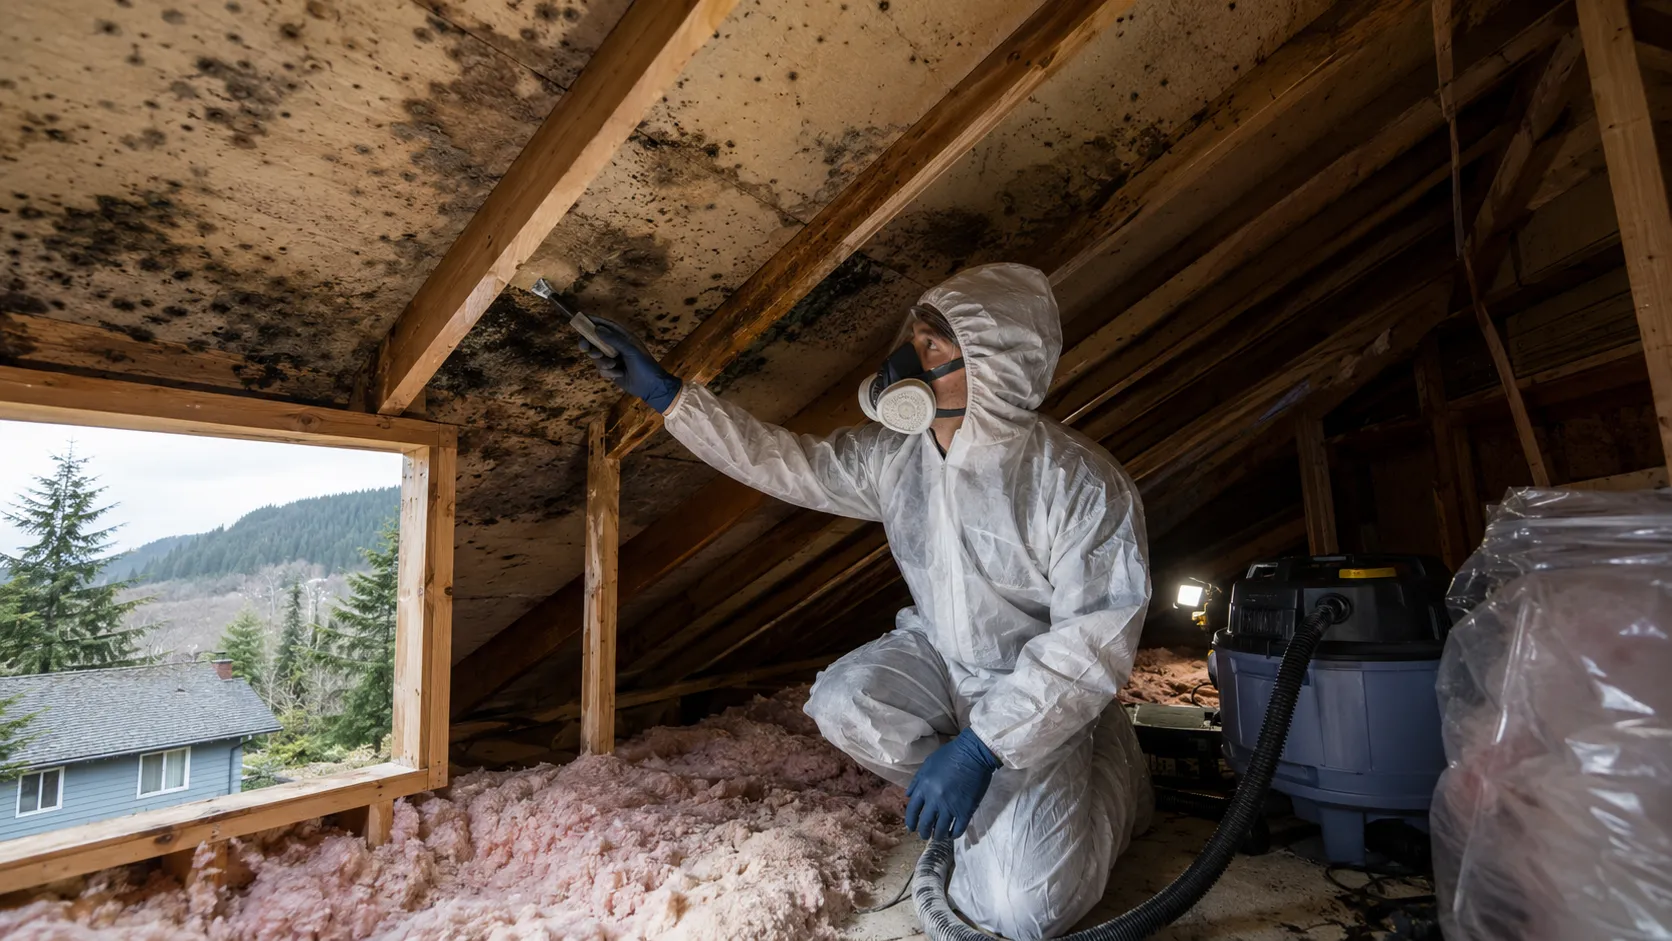
What Does a Professional Biohazard Cleanup Company Do?

When most individuals think about cleaning companies, they visualize vacuuming carpets, wiping countertops, or cleaning windows. However, there’s a completely different category of cleaning that many homeowners, property managers, and business owners hope never to need—biohazard cleanup. This field involves cleaning biological materials that are hazardous to one’s health if not handled properly. Knowing the work performed by professionals in biohazard cleanup will help you know when to call professionals for help, what to expect, and why hiring professionals is a must.

This article will cover what a variety of biohazard cleanup services are, what kind of training and equipment are used for this work, which circumstances require certified biohazard cleaners, and why it is so important to select a specialized company, such as Urban Environmental, for dealing with biohazard cleanup.

Understanding Biohazard Cleanup

Biohazard cleanup is a term employed to describe biohazard removal, cleanup, and disinfecting of spaces with biological material that can impact the health of human beings. Among the biological materials that may need to be taken away from an area are blood, body fluids, and dead bodies, as well as mold, sewer backups, and other pathogens causing diseases. Biohazard cleaning differs from regular cleaning in that it has to comply with health requirements and rules; it requires certain equipment and a thorough understanding of the behavior of pathogens.

Biohazard cleaning does not only involve making the area look clean but also making sure it is indeed safe to re-enter. The difference between these two concepts is critical. A surface may seem shiny and clean while being home to some dangerous viruses and bacteria. Consequently, one has to call a certified biohazard cleaner who is knowledgeable in the behavior of pathogens and biohazard cleaning methods.

Common Situations That Require Biohazard Cleanup

A property owner may find themselves having to call upon a biohazard cleanup company under many different circumstances. Here are a few instances when this could occur:

Unattended deaths and trauma sites. When somebody dies and the death is not discovered for some time, or when there has been a violent occurrence, the area where the body has lain may need a major decontamination process since body fluids may have seeped into the flooring.

Crime scene. Once the police have finished their investigations, there may still be blood or tissue left behind.

Suicide cleanup. Such situations can be emotionally challenging for those left behind, and thus cleanliness with sensitivity is very important in such a case.

Accidents and injuries related to work. Various kinds of accidents, whether workplace accidents, industrial accidents, or vehicle accidents, could leave blood or other liquids requiring appropriate cleaning.

Infectious diseases. Houses or establishments with infections would need to be disinfected to stop the spread of diseases.

Hoarding. Severe hoarding can lead to all types of waste products, mold, pest-infested areas, and any kind of unsanitary environment needing more than cleaning.

Sewage and flooding. Sewage has pathogens that could cause harm if not properly cleaned.

Pest infestation. Feces, urine, or rotten carcasses can create diseases; getting rid of them requires extra care.

Call for professionals biohazard company in all instances mentioned above.

The Step-by-Step Biohazard Cleanup Process

While each type of project varies based on the nature and extent of contamination, most professional companies have a very similar method used in the process of biohazard control.

  1. Assessment and Safety Planning : Once arriving at the site, the technicians conduct a full assessment of the location. They check the contamination level, define the possible threats, and find out how to remove biohazard material safely. Among other components of the process, it is crucial to check whether the structure has been damaged, whether it has enough air circulation and ventilation, and which materials should be completely removed from the site, such as an old carpet or gypsum board.
  2. Area Security : Before getting down to work, the vicinity must be secured so as not to have unintended cross-contamination. One way of achieving this is by using various physical barriers, creating negative air pressure, and denying access to unsecured individuals.
  3. Personal Protective Equipment (PPE) : Certified biohazard cleaners are always fully protected from any kind of infection by wearing special protective gear, including hazmat suits, breathing apparatus, gloves, and other protective wear. Such precautions are obligatory rather than optional due to the fact that the clean-up jobs are connected with exposure to many dangerous bacteria and chemicals.
  4. Removal of Contaminated Items : Porous materials such as carpet, upholstery, and drywall cannot be disinfected and therefore need to be removed and disposed of in accordance with established procedures for disposal of medical waste. At the same time, non-porous surfaces such as ceramic tile, metals, or sealed wood can be disinfected right where they are.
  5. Cleaning and Disinfection : This stage involves the use of hospital disinfectants and some special agents designed to kill pathogens, including blood-borne viruses, bacteria, or mold. All available surfaces in the affected area should be cleaned according to the standards of cleaning, rather than the soiled ones only.
  6. Odor Removal and Deodorization : Biohazard emergencies usually lead to enduring smells emanating from decay, microbial growth, or residue from chemicals. Expert teams employ scrubber technologies, ozone applications, and enzymatic treatments, which help eradicate smells right from the source instead of merely covering it up.
  7. Safe Disposal of Hazardous Waste : All contaminated items must be disposed of according to specific regulations. This process requires the waste to be carefully packed in various approved containers and transferred to a specific biohazard disposal company. This procedure is very well regulated, and failure to do it properly might lead to huge fines for the owners.
  8. Last Inspection and Clearance : As soon as the cleaning job is done, an inspection is carried out to check if the site complies with hygiene requirements and has not been contaminated by bacteria. Some service providers even offer laboratory analysis to check for pathogenic microorganisms, thus guaranteeing that the place can be used for living.

Why Certification and Training Matter

When it comes to biohazard clean-up, not all cleaning services are prepared. The biohazard clean-up teams are extensively trained in bloodborne pathogen care, OSHA safety practices, following rules for transportation of hazardous waste, and infection control. This training helps ensure that the technicians are aware of using appropriate safety measures.

Besides, the certifications guarantee that the company is acquainted with the legal regulations involving biohazard cleaning. The rules differ depending on where a company is situated, and every reliable cleaning service in Canada is regularly updated to follow the existing regulations. That is, proper documentation is necessary, the waste chain of custody must be followed, and the regulations of provincial health authorities must be observed.

Trying to clean biohazard waste without proper training is very risky. Pathogens like Hepatitis B and C and HIV can survive for a long time on surfaces and cause problems through minor injuries as well as through membrane contact.

The Emotional Side of Biohazard Cleanup

The importance of biohazard cleaning extends beyond simply being a technical aspect. The process often has an emotional aspect that should not be ignored. Families often find themselves in an emotional state of vulnerability when dealing with the consequences of traumas such as death, suicide, or accidents. A professional biohazard cleaning team understands this fact and hence serves with compassion and consideration to all involved.

The professionals arrive in unmarked vehicles, deal gently with the family, and try to minimize the time that the family has to spend in the affected area. The best companies do not limit their responsibility to only making the place safe, as the service they provide has an emotional component as well.

Why Choose Urban Environmental

The first thing you should consider when choosing a biohazard cleanup company in Canada is their experience, certification, and empathy. Urban Environmental is known for its professional biohazard cleanup services that combine expertise with dedication to its clients.

Urban Environmental has also introduced a team of experienced cleanup professionals trained to tackle the toughest cases, from trauma and crime scene cleanup to hoarding cases and infectious diseases. We know that every case is different and therefore tailor our approach specifically to the needs of the situation and property.

use state-of-the-art equipment and disinfectants and follow rigorous safety protocols to provide services of the highest standard. We are also aware of all the Canadian safety and health requirements, which allow us to ensure proper disposal of any hazardous waste we handle.

Urban Environmental believes in giving clients the courtesy and respect to each and every client, even in difficult times. The situation arises often when the call for biohazard cleanup places the industrial facility employee on high alert. As a result, the people associated with Urban Environmental are known for their quick reaction and good quality work.

What to Look for in a Biohazard Cleanup Company

If you need biohazard remediation services, there are certain things to look for in a service provider.

  1. Certification and training: Verify that the technicians have gone through all necessary training and certification as per OSHA and state health and safety standards.
  2. Experience in your particular case: If the situation involves trauma, sewage overflow, or hoarding, find a company specialized in that rather than one that covers several fields.
  3. Proper tools and disposal practices: The cleaning company must use disinfectants suitable for hospitals and also properly dispose of the waste.
  4. Insurance and licenses: Make sure the company has all the required licenses and insurance for biohazard work in your state.
  5. Compassionate service: Especially in trauma situations, the cleaning company should understand your pain and be professional at the same time.
  6. Proper timing: The situation may be serious and needs to be solved in the shortest time.

Final Thoughts

Biohazard cleanup is a profession that requires specialized training, and as a result, it is highly regulated. The scope of biohazard cleanup encompasses trauma and crime scenes and situations that involve sewage backup and hoarding conditions, which require persons who have skills in pathogen control, legal requirements for hazardous waste disposal, and emotional sensitivity.

When looking for a biohazard cleanup company in Canada, make sure that you choose a qualified one to ensure the safety and thoroughness of the cleanup process. Urban Environmental, a proud provider of reliable biohazard cleanup, has qualified biohazard cleanup specialists who possess all the necessary skills to perform their job.

If you have faced a biohazard situation, it is better not to deal with the problem on your own and call a reliable team of professionals.

What Can Dry Ice Blasting Remove from Building Surfaces?

Buildings that endure fire, water, or biological damage will frequently have residues that are difficult to clean even with regular cleaning techniques. Soot can adhere to drywall, the smoke smell can permeate the wood structure, mold can develop on wet masonry, and charring can cover structural beams. Owners and managers of properties are starting to be concerned with what one can clean using dry ice blasting, so one needs to know whether this technique can help to restore the property.

Urban Environmental is a company that uses advanced techniques of surface remediation. Dry ice blasting has become one of the most effective technologies for restoration. The following article gives a description of the dry ice blasting process, types of contamination that can be eliminated with its help, and reasons for its increasing popularity among professionals who conduct the restoration of buildings.

Understanding Dry Ice Blasting

Dry ice blasting is a type of cleaning known for being non-damaging to surfaces. It is a technique that uses compressed air to shoot tiny pieces of solid dry carbon dioxide at an object. Unlike sandblasting or soda blasting, the dry ice used in this technique turns into gas right after it hits the surface of the object; hence, it leaves no secondary waste. The kinetic energy of small dry ice chips, added to the freezing temperature of dry ice (-78.5°C), assists in breaking and removing dirt and other materials from the surface.

Thanks to its unique characteristics, dry ice blasting is one of the best techniques for using dry ice to remove unwanted dirt. That being said, this method is very efficient when applied to certain surfaces, especially after fire, flood, or prolonged neglect. Adding to that, no moisture, grit, or chemicals that usually come with the standard cleaning technologies are used during the dry ice cleaning process.

What Can Dry Ice Blasting Remove From Building Surfaces?

In simple terms, dry ice blasting helps eliminate many kinds of contaminants from almost all construction materials. For example, it can be used on wooden, concrete, or stone buildings, or a building made of metal or plaster. Let’s take a look at the most common uses of this method.

Soot Removal

After the fire is extinguished, it leaves a lot more than just burned objects in its way. Instead of being burned, nearby objects are covered in soot. Soot particles make it hard to perform any kind of cleaning since they have a static charge and can penetrate into porous materials (such as drywall, plaster, or unsealed wood).

Classic cleaning techniques (like scrubbing or using an abrasive sponge) fail to help as they simply push the soot even deeper into the construction material. That’s where dry ice blasting is superior—the pellets created through this method break the soot layers upon impact and help to easily remove it without pressing it into the surface even more.

Dry ice blasting can be used effectively on:

  • Ceiling joists and rafters that are visible after a fire has been restored
  • Air-conditioning ducts that are covered in soot after a fire
  • Fireplaces and chimneys that are made out of brick or masonry
  • Steel beams and other support system parts in commercial buildings.

Smoke Residue Removal

In addition to visible soot, smoke also leaves behind invisible residues that can be found in wall spaces, lumber, and thermal insulation. These residues often cause the lingering smell of smoke, which can remain in the building long after visible fire damage is cleaned.

Smoke residue removal is one of the more technically complex parts of the restoration process because residues may be acidic, sticky, or oily depending on what materials burned.

If smoke residues are left untreated, they will keep emitting gases and create odor problems for the building occupants.

The use of dry ice blasting solves the problem of residue removal by removing the residue layer without introducing any moisture that could activate the smell. Since the CO₂ pellets immediately vaporize, there is no washing stage involved, and the issue of dirty water is absent.

It is clear that this method is much better than pressure washing, which may push smoke residues even deeper into wood or masonry.

Mould-Spore Removal

One major distress that individuals in charge of maintaining their homes have to contend with is mold contamination. Mould spores can thrive on practically every organic surface that contains moisture, including wooden structures, flooring, panels, and even concrete that is sufficiently moist.

Mould-spore removal through dry ice blasting is a preferred method among remediation specialists, as it relies on the fact that mould requires moisture to grow and propagate. Traditional mold removal methods often rely on abrasive techniques such as wire brushing, sanding, or chemicals that may cause spores to become airborne and spread around.

Using dry ice blasting alongside the right containment and negative air pressure systems enables technicians to:

  1. Get rid of mold from wooden structures, joists, and flooring.
  2. Remove mold from concrete walls and foundations
  3. Treat HVAC components without taking them apart in many cases

As a rule of thumb, mold remediation has to be employed in conjunction with whatever led to the presence of moisture because, while dry ice blasting is suitable for eliminating mould, Urban Environmental Remediation Services plans to help clients eliminate the root causes of mold problems before they occur.

Char Removal

When a fire burns thoroughly enough to cause wood or structural materials to char, it creates a brittle black layer of char that should be taken away before repairs, sealing, or encapsulation can take place. The process of char removal is a vital component of fire restoration, especially when dealing with structural timbers, which can still be saved if only the char level is removed after being taken off safely.

Dry ice blasting is particularly effective in this case because it can remove the fragile char layer without damaging the wood beneath. This method is much softer as compared to mechanical sanding or wire brushing, which can possibly chip or indiscriminately remove materials, causing structural issues with load-bearing components. Thanks to the properly adjustable pressure of the dry ice blasting equipment, technicians can regulate the intensity of the blast according to the material and the general extent of carbonization.

Additional Contaminants Dry Ice Blasting Can Remove

Although among the most popular methods, besides removing soot, smoke residue, mold, and char, the use of dry ice blasting also facilitates:

  • The removal of grease and oil from industrial kitchens and production plants
  • Removing graffiti and paint from metal, brick, and concrete surfaces
  • The removal of biofilm and algae from outdoor facades of buildings
  • Residues from adhesive tapes, labels, and old signs
  • Wiping off accumulated dirt and dust from production environments
  • Killing bacteria and viruses, which makes this method particularly useful in the food processing industry and medical service agencies.

This multifunctional application makes dry ice blasting one of the techniques used across different sectors, from historical preservation to industrial equipment maintenance and reconstruction.

Why Choose Dry Ice Blasting Over Traditional Cleaning Methods?

Knowing what dry ice contaminant removal can clean is just one aspect. Owners of various properties may be interested in understanding the advantages of this process, which make it preferable to some other cleaning methods. Some benefits of dry ice blasting include:

No Residual Waste. Dry ice turns into gas once it strikes the surface of the object being cleaned, and therefore there won’t be cleaning waste left after the procedure, unlike some other methods with waste harmful to the environment.

Dry Process. Dry ice cleaning won’t bring any water into the materials being cleaned, which is very important during mold cleaning and when working with electrical devices.

Doesn’t Damage Any Surfaces. The process can be regulated in a way that the surfaces won’t be damaged during cleaning, which is especially useful for cleaning historical sites.

Less Time Needed for Dry Ice Cleaning. Due to the fact that dry ice cleaning doesn’t require rinsing, cleaning waste, or masking time, which is often needed when using traditional cleaning methods.

Minimized Health Hazards. The use of dry ice blasting does not include any hazardous chemicals, and when used with good ventilation and containment measures, it reduces the chances of the release of airborne contaminants when compared with dry sanding or brushing.

The Dry Ice Blasting Process: What to Expect

Property owners who are new to this method can benefit from understanding the process of removing contaminants using dry ice. In general terms, the process consists of five main steps:

  1. Assessment and Testing:Before starting any work, the technicians make sure to evaluate the level of contamination, the materials involved, and whether there are any structural issues.
  2. Containment Setup : Barriers and negative air systems are put in place to avoid cross-contamination of rooms.
  3. Blasting: The technicians use specialized equipment to apply pellets of dry ice to the surfaces.
  4. Inspection : After the blasting process is over, all the surfaces are checked to see whether complete decontamination was achieved.
  5. Follow-Up Treatment : Sometimes, additional treatments such as antimicrobial treatment or odor sealing may be needed if there has been a case of mold or the smell of the contaminant persists.

When Dry Ice Blasting May Not Be the Right Fit

Although dry ice blasting is very flexible, it may not be the best choice in every case. Deep stains, certain biological contaminations requiring chemical disinfection, and surfaces that are structurally unstable may need a combined method. An experienced remediation team should analyze each job separately, instead of attempting to apply a universal approach.

This is why it’s important to have the help of professionals, who can decide whether dry ice blasting is sufficient by itself or it should be combined with other processes.

Trust Urban Environmental for Professional Restoration

The choice of the remediation method could mean success in restoring your property rather than just expensive repairs. The technicians at Urban Environmental know how to use advanced dry ice blasting techniques, and these methods can be applied safely regardless of the type of material and type of contamination.

Whether it is fire damage that demands soot removal and smoke removal, mould infestation, which requires thorough mould removal, or burnt structures that need professional removal of charred materials, the specialists at Urban Environmental are equipped with the means and the knowledge to provide your property with the necessary service.

While working on every project, we find out the most complete information about the contamination, materials affected, and the extent of damage. Our goal is to make your building safe and clean, and we do our best to achieve results with the minimum effort and time.

Conclusion

Dry ice blasting has shown itself to be one of the most effective and versatile methods of building remediation. If the building has been damaged by fire, water, or biological attack, where there is soot and smoke, mold and spores, or even charred wood, this method can be employed to provide solutions that are not offered by other forms of cleaning.

If your building has gone through fire, water, or biological damage and you would like to know how dry ice blasting works in the removal of any materials from the surfaces of your building, get in touch with Urban Environmental as soon as possible.

Asbestos Removal Before Renovating an Older Vancouver Home

Homeowners with properties built in Vancouver before the 1990s should be wary of the danger of having hidden asbestos. This can make a home renovation difficult and dangerous if not managed properly. That is why being properly informed and having the right plan of action for handling asbestos is imperative for Vancouver homeowners planning any remodeling. This article will cover everything one needs to know about removing asbestos properly and safely.

Why Older Vancouver Homes Are at Higher Risk

The housing market in Vancouver is rich with character homes, post-World War II bungalows, and mid-century residences built from the 1930s to the 1990s. This is the time when asbestos was widely used for construction purposes because of its resistance to fire, its insulation abilities, and its long lifespan. Abundant in different formats and forms, asbestos can be found in many building materials such as insulation in attics, popcorn ceilings, vinyl flooring, pipe insulation, drywall compound, roofing shingles, and stucco.

The issue is not related to asbestos itself but to its vibration and disturbance, such that during sanding, drilling, cutting, and demolishing of materials containing this material, tiny asbestos fibers are released into the air. These very fibers, when inhaled, can settle in the lungs and result in various serious diseases such as asbestosis, lung cancer, or mesothelioma if not managed properly. This is the reason why renovation and demolition processes are consistently among the major causes of asbestos exposure.

Renovation Is the Riskiest Time for Asbestos Exposure

Most homeowners believe that as long as a certain material has not been disturbed for years, it can remain in place without risk—while this is correct in some cases, it is not always so. Though asbestos may be intact, it can nevertheless pose a risk to health because once it is disturbed in any way, it may become hazardous.

Professional asbestos removal in Vancouver service guide are able to help educate homeowners about the process of asbestos removal. Homeowners may need specific information depending on the project they are planning to implement — be it kitchen updates, flooring refinishing, or simple renovations.

Step 1: Get a Professional Asbestos Inspection

Prior to demolishing or renovating your property, it is important to have a certified asbestos inspector conduct a study. This study includes the following services:

  • A visual inspection of the target materials (such as insulation, flooring, ceiling texture, siding, etc.)
  • Collection of samples from areas that will be impacted during the renovation or demolition processes.
  • Lab analysis to find out whether asbestos is present and determine its level of concentration.

In British Columbia, having an asbestos inspector conduct a study is mandatory under the WorkSafeBC regulations for the majority of renovation or demolition projects. Ignoring this obligation might result in receiving stop-work orders and fines, as well as liability in case a worker or a neighbor becomes exposed to asbestos.

Step 2: Understand Your Removal Options

If asbestos is discovered, the subsequent action will depend on the quantity of asbestos found and the area affected. Different types of asbestos-containing materials need different kinds of treatment:

  • Encapsulation : This process prevents the release of asbestos fibers from the material and is generally used in undisturbed places.
  • Removal : This method involves the physical removal of the material and should be performed whenever the area will be renovated, destroyed, or disturbed.
  • Total abatement : This refers to the total removal of any type of asbestos material from a home before doing a complete renovation project.

A licensed contractor specializing in asbestos removal Vancouver services will analyze the situation and recommend the safest and best solution for you based on the situation.

Step 3: Hire Licensed, Insured Professionals

Asbestos elimination is not your usual do-it-yourself project. It requires the use of specialized tools, protective clothing, containment methods, air pressure technology, disposal methods, and recognized waste disposal centers. When hiring an asbestos abatement company, keep these things in mind:

  • Certification from WorkSafe Acronyms
  • Proof that the company has dealt with the abatement of homes before
  • A well-laid-out estimate explaining every stage of the process
  • Insurance coverage
  • Making sure that air quality is verified to be safe.

Your Asbestos Removal Vancouver Property Owner Checklist

To ensure your renovations can proceed smoothly and legally, make use of this handy asbestos removal Vancouver property owner checklist:

  1. Check how old your home is – Homes built prior to 1990 pose a greater risk and should be evaluated, irrespective of their visible condition.
  2. Get your home tested by a professional—It’s important that suspicious materials be checked before starting your renovation.
  3. Review the lab results—It’s vital to know precisely which materials possess the problem and their exact locations.
  4. Gather several quotations—The price, schedule, and good standing of licensed contractors should be compared to choose the right one.
  5. Make sure that all documents are prepared—The City of Vancouver requires hazardous material documentation for proof of demolition and renovation.
  6. Discuss containment measures – Ask how the work areas will be isolated from other parts of the house.
  7. Request clearance tests – Do not start working without tests confirming the air quality.
  8. Save all necessary documents – The information provided by the inspections, invoices, and records should be kept for future sale of the house.
  9. Keep everyone informed—Make sure that all residents know the timeframe of the renovation, and plans for temporary relocation.

The Cost of Skipping This Step

Skipping testing may be tempting to save time or money, especially on small renovations. However, the risks that come with it are greater than the convenience. In addition to serious health risks presented by asbestos in the air, homeowners who do not take appropriate steps for removal may also receive a cease-and-desist order, fines from WorkSafeBC, or even not be able to sell their homes in the future. In today’s world of real estate transactions, people more and more often inquire for asbestos-related documents when purchasing pre-1990 houses.

Guide for Renovating Without Worry

Renovating an older house in Vancouver is a good idea because it can contribute a lot of character and value to the building, provided the renovation is executed legally and safely. The task of renovation does not require going through a lot of struggles; all that is needed is to execute it appropriately.

Renovation should start with contacting a professional who can conduct the needed inspection for the property. This approach is the most important step to achieving your renovation goal.

Attic Mould Removal in North Vancouver: What Homeowners Should Know

Skipping testing may be tempting to save time or money, especially on small renovations. However, the risks that come with it are greater than the convenience. In addition to serious health risks presented by asbestos in the air, homeowners who do not take appropriate steps for removal may also receive a cease-and-desist order, fines from WorkSafeBC, or even not be able to sell their homes in the future. In today’s world of real estate transactions, people more and more often inquire about asbestos-related documents when purchasing pre-1990 houses.

Urban Environmental educates homeowners on the significance of correctly assessing and removing attic mold. For reliable and effective attic mold removal North Vancouver professionals’ inspections and remediation are necessary.

Guide for Renovating Without Worry

Renovating an older house in Vancouver is a good idea because it can contribute a lot of character and value to the building, provided the renovation is executed legally and safely. The task of renovation does not require going through a lot of struggles; all that is needed is to execute it appropriately.

Renovation should start with contacting a professional who can conduct the needed inspection for the property. This approach is the most important step to achieving your renovation goal.

Why Attics in North Vancouver Are So Prone to Mould

The climatic conditions of North Vancouver are one factor contributing to this situation. With an average rainfall of more than 1,500 mm in a year and long periods of humid and gloomy weather, the local homes are subjected to a much greater degree of humidity than other areas of Canada. On top of that, one must consider aspects such as older housing stock, poorly insulated attics, and roofs constructed in the past without taking modern ventilation requirements into account.

Here are the most frequent reasons for attic mold appearance in this part of the country:

  • Poor attic ventilation – when the warm and moist air rises to the attic from the living premises and cannot get out, it condenses on the inner surface of the roof sheathing.
  • Leaky roofs – water can get into the attic through any openings in flashing, vents, and shingles.
  • Lack of insulation – the presence of gaps in the insulation allows warm air to escape into the attic and causes different temperatures, which lead to condensation.
  • Home exhaust fans located in the bathroom and kitchen venting into the attic—some old houses have an issue with incorrectly placed exhaust, which leads to venting of moisture into the attic

Signs You May Have Attic Mould

Since attics are rarely seen by many homeowners, mould may form inside the attic unnoticed for months. Here are a few signs to look for:

  • A damp, earthy odour in an upstairs room or a closet
  • Dark surfaces on the lower part of the roof
  • Wet patches on the ceiling
  • Increased allergies, coughing, or other respiratory problems for family members

Frost or humidity on the inside of the roof during the winter

If any of these is familiar to you, you should order a professional inspection now. Mould spreads really fast under the right conditions, so a small patch may become a large area in a couple of weeks.

The Attic Mould Removal Process: A Service Guide

Informed knowledge about what a professional remediation process entails can help you know the expectations and ensure that quality service is rendered. Our attic mould removal in North Vancouver guide service process usually involves the following stages:

  1. Inspection and Evaluation : A qualified technician inspects the attic for the presence of mould, moisture origin, and structural damage. The procedure includes moisture detection and sometimes air quality assessment.
  2. Containment : The space is sealed before any mould is disturbed to prevent the spores from circulating across the house through the HVAC system and open holes.
  3. Mould Elimination : The next stage would be dependent on how serious the case is. The commonest treatment is dry ice blasting since it removes mould effectively and does not damage the wood or add moisture back.
  4. Disinfection and Deodorization : After the visible mould is removed, the entire attic is treated with an antimicrobial solution.
  5. Elimination of the Reason for Mold Formation : This is a stage that many homeowners neglect, yet it might be one of the most important stages of the process.

Why Choose a Local Specialist

Mould remediation is not a universal service; it comes with specific challenges when applied to North Vancouver homes because of our coastal climate and older housing stock like the ones in Lynn Valley and Deep Cove. It’s crucial to hire a company that understands these local issues rather than a general pest control company or handyman because such companies will provide you with subpar service.

Urban Environmental team is all about finding the source of the mould problem in your attic instead of merely trying to treat it on the surface. We combine comprehensive inspections with safe and tested removal processes as well as practical prevention tips specifically meant for North Vancouver homes.

Final Thoughts

Finding mold in the attic can be a problem that is manageable for quite some time. Due to the wet weather in North Vancouver, it is not a question of if there will be moisture problems in one’s attic; the question is when it will happen unless one ensures proper ventilation, insulation, and regular inspection.

Anyone who has mould in an attic or hasn’t checked the attic in a while should take action. One must contact Urban Environmental to get the attic assessed and a remediation plan that fits the current state of the attic. A healthy attic leads to a healthier home and easier life during rainy seasons. For an attic mould removal in North Vancouver property owner checklist, homeowners should ensure that the attic is properly inspected and any mould concerns are addressed promptly.

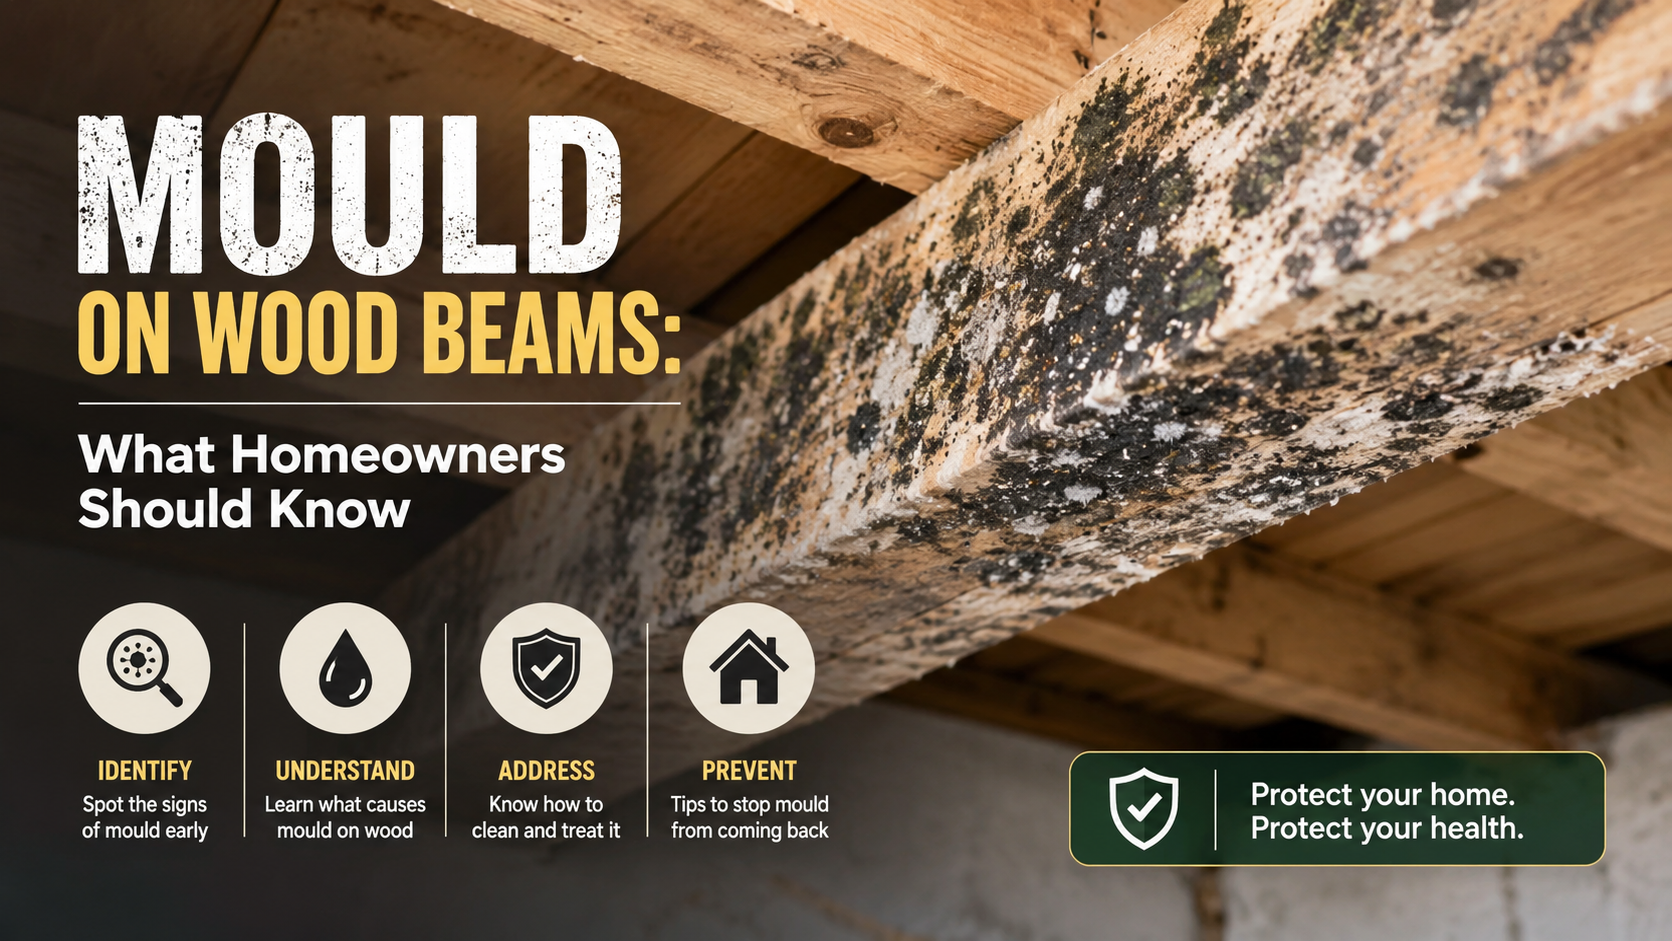
Mould on Wood Beams: What Homeowners Should Know

Every structure has a story to tell; the structure of your house has a story written in the structure of everything around you; beams of wood are keeping your floors, attic, and walls together, and they have weathered countless storms during the years, they have outlived many seasons. The only thing that’s going to ruin that story is a little thing called mould. It kills the wood very slowly, giving it plenty of time to make itself comfortable and become a permanent resident of the wood beams in your house. Most homeowners will never see how serious a problem mould in their home is until it has made itself at home for quite some time. Therefore, mould on wood beams is one of the most overlooked dangers to the future of a house as well as the people living in it.

Why Wood and Mould Are Such Dangerous Companions

For fungal growth, wood is essentially a 5-star hotel. It is extremely porous and retains moisture, plus it has lots of organic material for the spores of moulds to use for food. For mould to grow, all it needs is to be between 2°C-40°C, humidity levels are above 60%, plus it needs to be a little dark. Your attic, basement or crawlspace basically gift wraps these conditions to mould all year round.

Once the spore lands on a damp beam and establishes itself, you can expect to see evidence of mould within 24 to 48 hours. In a matter of weeks, what started as a small fuzzy patch will develop into a vast network of hyphae (the thread-like roots of the mould) that continues to invade further and further into the fibres of the wood.

This issue is not merely aesthetic either. This is just the start of structural mould damage.

The Hidden Architecture of the Problem

Homeowners mostly only notice mould when it is visible, such as on the ceiling of the bathroom, the wall of the basement, or in the corner behind a washing machine. However, attic mould is common and dangerous, mainly because people do not check them often enough.

Attics are very susceptible to mould for many reasons. They are subject to roof leaks that, even if they are small, cause water to drip directly onto structural lumber. There is also no way for moisture trapped in the warm humid air to escape from wood surfaces until that humid warm air is removed by airflow. Kitchen and bathroom exhaust fans that vent into an attic instead of outside also release moisture into an attic by pumping hot wet air directly onto the supports (i.e., beams) that support the roof over head. The result is an accumulation of moisture, without any evidence of it, that allows mould to grow and become established within the structure of a home.

Urban Environmental inspectors have found Stachybotrys chartarum (commonly known as “black mould”) growing on attic beams that the homeowner had no idea about. Black mould is very aggressive, and it can produce mycotoxins that will become airborne and circulate throughout the ventilation system within a house to negatively impact indoor air quality, as evidenced by respiratory issues, headaches, fatigue, and severe allergic reactions in sensitive individuals.

Reading the Signs Before It’s Too Late

Mould that exists on wood beams can cause serious damage to a house but often the worst of this damage will not be seen by homeowners because it occurs out of sight. However, if you know what to look for, you can see some of the signals that indicate the presence of mould.

The first and most obvious indicator of mould presence is discolouration. Greyed wood, dark streaks along the beams and fuzzy green, white or black patches on wood beams indicate the presence of an active colony of mould. A musty/earthy smell is another indicator of mould presence. The “musty” smell will be present long before any other visual signs of mould will be present; especially in enclosed spaces such as attics and/or crawl spaces. The “musty” smell is an indication of the off gassing of the by-products of the mould metabolic processes and is a visual indication for what can not be seen.

A later stage indicator of mould present on wood beams is the warping/softening of the wood itself. When mould has been feeding on a wood beam long enough to weaken the wood enough to lose its structural integrity or cause the creation of small cracks and/or soft spots (on drywall) near supporting points.

When you see any of these indications of structural damage by mould on wood, you really should contact a professional inspector.

What Wood Mould Removal Actually Involves

Here’s a truth many DIY methods won’t tell you: The wood mould removal from structural beams is not a 2-day do-it-yourself project.

The old trick of using bleach to clean surfaces works for cleaning off the surface of mould, but since wood is a porous material, bleach cannot penetrate the surface of the wood effectively. Any roots of mould on the beam will regrow, many times worse than before. You’re not fixing the problem; you’re only causing the mould to temporarily retreat.

The correct way to remove mould from wood by a professional involves the following:

  1. Containment: the contaminated area must be isolated from the rest of the house to avoid the spread of mould spores to the remaining clean areas of your house during the hazmat removal process of contamination.
  2. Removal: If you have a severe mould infestation, some of the beam will need to be removed and replaced because you cannot repair wood beyond a certain depth with a product.
  3. Treatment: After the mould is removed, a special antimicrobial product will be applied to the affected areas, as well as the surrounding areas, to stop any mould from coming back.
  4. Drying/Monitoring: The source of the moisture will need to be identified and corrected in order for mould to not return.

We take the same full-cycle approach to every mould remediation job at Urban Environmental, because we don’t want to make money providing the same service to you over and over by addressing the symptom and not the root cause!

The Indoor Air Quality Consequence You Can’t Ignore

One of the least considered aspects of mold on wooden beams is how it impacts the quality of the air we breathe on a daily basis. Air in buildings becomes significantly contaminated with mold spores and mycotoxins as mold grows and reproduces, so when there are active colonies of mold growing in structural materials in the building, there will be a significant decrease in indoor air quality.

The World Health Organization has stated that mold exposure contributing to indoor air quality has resulted in chronic respiratory diseases and an increase in the severity of asthma and decreased lung development in very young children. Since most people spend more than 90% of their lives indoors, this is not an issue that can be overlooked — this is an issue that needs to be addressed.

This is why Urban Environmental performs air quality testing in conjunction with all structural mold removal, providing a clear before-and-after photo showing what the results of the removal efforts actually accomplished.

Prevention Is Significantly Cheaper Than Cure

If there’s one thing that a decade of environmental remediation work teaches you, it’s that the homeowners who invest in prevention spend a fraction of what those who wait until crisis hits will eventually pay.

Inspect your attic and crawl spaces at least once a year, particularly after heavy rainfall or winter. Ensure all exhaust fans vent to the outside. Maintain gutters and downspouts so water is directed well away from your foundation. Monitor indoor humidity with an inexpensive hygrometer and keep levels below 55%.

And if you’re buying a home? Always insist on a mould inspection before you sign. What’s hid den in the beams above and below your living space matters every bit as much as what the estate agent is showing you.

What Does a Professional Biohazard Cleanup Company Do?

A property manager in New Westminster gets a call on a Tuesday afternoon. A tenant has been found deceased in a third-floor suite, and the coroner’s service has finished its work. The RCMP tape is down. The unit is now, officially, the property manager’s problem — and nobody at the property management office has any idea what happens next.

That gap is where most people first encounter this industry. The authorities investigate, document, and remove the deceased. What they do not do is clean. Once a scene is released, restoring the property to a safe, habitable condition falls to the owner, the executor, the strata, or the employer — and it is not a job for a mop and a bottle of bleach.

This article explains, in practical detail, what a professional biohazard cleanup company actually does: how contamination gets assessed, what the crew physically does inside the containment, which regulations govern the work in British Columbia, what happens to the waste, and how anyone can tell whether a company is genuinely qualified or just confident. If you are trying to make a decision quickly and under stress, the short answer comes first.

The short answer

A biohazard cleanup company is a specialist remediation contractor that assesses, contains, removes, decontaminates, and lawfully disposes of biological contamination — blood, bodily fluids, tissue, decomposition residue, sewage, and pathogen-bearing materials — then verifies that the space is safe for people to reoccupy.

The work has four defining characteristics that distinguish it from cleaning:

  1. It begins with a contamination assessment, not a quote for square footage.
  2. It is performed inside engineered containment with respiratory protection and controlled airflow.
  3. It treats the removed material as regulated waste, tracked from the property to a licensed disposal facility.
  4. It ends with documented verification, not a visual once-over.

Remove any one of those and it stops being remediation.

What actually counts as a biohazard

“Biohazard” is a broader category than most people assume, and the scenes are more varied than television suggests. In practice, a biohazard cleanup company is called for:

  • Unattended deaths. A death discovered days or weeks later. Decomposition releases fluids that migrate through flooring, subfloor, and drywall, and volatile compounds that saturate porous materials well beyond the visible area.
  • Trauma and crime scenes. Scenes involving significant blood loss, including after police and coroner release.
  • Suicide. Handled with the same technical rigour and considerably more care for the family present.
  • Sewage backups and Category 3 water losses. Sewage carries bacterial, viral, and parasitic loads and is treated as grossly contaminated.
  • Infectious disease decontamination. Post-outbreak cleaning of workplaces, care facilities, transit vehicles, and shared housing.
  • Hoarding and severe neglect conditions. Often a compound problem: biological contamination layered with pest infestation, mould, and structural damage.
  • Drug-involved sites. Discarded needles, sharps, and residue in vacated units or public-facing properties.
  • Animal decomposition and infestation aftermath. Including attic, crawlspace, and wall-cavity contamination.

Urban Environmental’s own service framing groups the hazards by route of transmission — airborne, bloodborne, and vector — which is a genuinely useful way to think about it, because the route determines the control.

Airborne pathogens travel in respirable aerosols and droplets. They drive the requirement for HEPA filtration, negative or positive air pressure, and fitted respiratory protection.

Bloodborne pathogens — hepatitis B, hepatitis C, HIV among them — transmit through mucous membranes and breaks in the skin. They drive PPE selection, sharps handling protocols, and the assumption that all blood is infectious regardless of what anyone knows about the individual.

Vector-borne contamination arrives with the insects and animals that a decomposing body or a hoarding condition attracts. Vectors spread material well past the origin point, which is why an experienced crew scopes a much larger area than the obvious one.

That last point deserves emphasis, because it is the single most common thing homeowners get wrong: contamination is almost always larger than it looks. Fluid follows gravity and capillary action. It travels along joists, under laminate, down through subfloor seams, into wall cavities, and along the underside of flooring where nothing is visible from above. A stain the size of a dinner plate on carpet can mean two square metres of contaminated subfloor beneath it.

Why this is not a cleaning job

There is a persistent assumption that biohazard work is just intensive cleaning performed by people with strong stomachs. It is closer to the opposite: the emotional difficulty is real, but the technical difficulty is what makes it a licensed trade.

Consider what a general cleaning crew cannot do:

  • They cannot conduct a hazard assessment or write the exposure control plan that provincial regulation requires before workers are exposed to a biological agent.
  • They cannot build containment. Sealing a work area and controlling its air pressure so contaminants do not migrate into the rest of the building requires equipment and a plan.
  • They cannot legally transport the waste. Contaminated material is not household garbage, and moving it requires specific packaging and, depending on classification, licensing.
  • They cannot verify the result. Disinfectant on a surface is not proof of decontamination. Verification requires documented protocol and, where warranted, testing.
  • They cannot remediate structure. Porous materials that have absorbed biological material generally cannot be cleaned. They have to come out, which means controlled demolition — and knowing how to do that without spreading contamination.

There is also a liability dimension that property owners underestimate. If contamination is left in place and a subsequent occupant becomes ill, or if an untrained person is exposed during a DIY attempt, the documentation of what was done — and by whom, to what standard — matters enormously. A qualified contractor produces that record as a matter of course.

What professional biohazard cleanup actually involves, step by step

Every scene differs, but competent work follows a recognisable sequence. This is what a properly run project looks like from intake to release.

1. Intake and confirmation of scene release

The first call establishes what happened, where, when it was discovered, who has jurisdiction, and whether the scene has been formally released by police or the coroner. No legitimate contractor enters an active scene. If an investigation is ongoing, the crew waits.

Intake also establishes who is authorising the work — owner, executor, strata, insurer, or employer — because that determines the paperwork.

2. On-site contamination assessment

A technician attends and performs a contamination assessment: mapping the affected area, identifying the extent of migration, probing beneath flooring where necessary, checking adjacent rooms and the level below, assessing HVAC involvement, and identifying secondary hazards. Older Lower Mainland housing stock adds a wrinkle here — a project in a pre-1990 building may uncover asbestos-containing materials or vermiculite, which means the scope expands to include abatement before any demolition proceeds.

The assessment produces the scope of work, the containment plan, and the estimate. It is also the point at which a good contractor tells you plainly what can be salvaged and what cannot.

3. Hazard assessment, exposure control, and PPE

Before anyone enters, the hazards are documented and controls are selected. In British Columbia this is not discretionary. The WorkSafeBC Occupational Health and Safety Regulation requires an employer whose workers face occupational exposure to a designated biological agent to have a written exposure control plan covering, among other things, infection-control precautions, housekeeping practices to keep the workplace free from spills and accidental contamination, procedures for handling contaminated laundry, a description of the PPE selected to minimise exposure, and a program to train and supervise workers accordingly.

The regulation also codifies the precautionary principle — where the identity or transmission route of an agent has not been established, workers adopt provisional precautions covering all routes, at a higher level of protection. In plain terms: when in doubt, over-protect. That principle is why crews suit up the same way whether or not anyone knows the deceased person’s medical history.

Typical protection includes full-body coveralls, nitrile gloves (frequently double-gloved), eye protection, and respiratory protection appropriate to the assessed hazard, with fit-testing and decontamination procedures for removing it without self-contaminating.

4. Containment and engineering controls

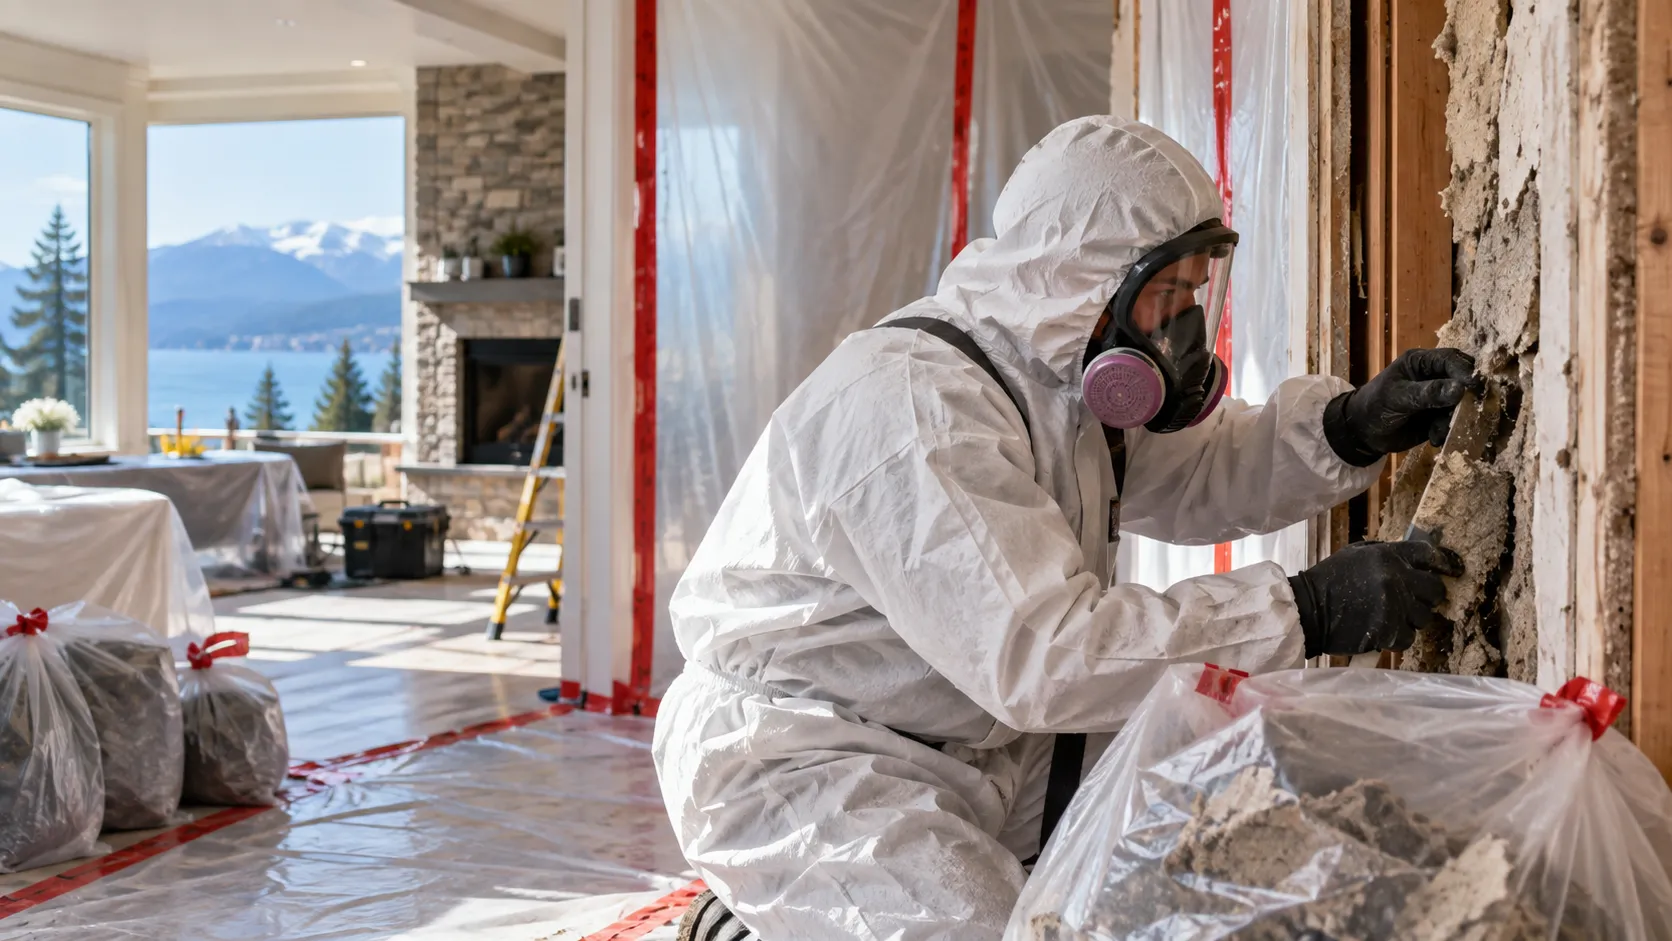
The work area is isolated — doorways and openings sealed with polyethylene sheeting, HVAC registers closed off, and a decontamination path established so technicians can enter and exit without tracking material through the building.

Airflow is then controlled deliberately. HEPA air filtration devices scrub airborne particulate, and the containment is set to either negative or positive pressure depending on the objective. Urban Environmental notes using positive-pressure environments for post-viral decontamination work, so that air moves outward rather than drawing in from unfiltered spaces, combined with HEPA cabinet air scrubbing to capture biological contaminants. For decomposition and trauma work, negative pressure is more typical, holding contaminants inside the containment. Either way, the point is the same: air is a transport medium, and unmanaged air undoes the rest of the job.

5. Gross removal and contents triage

Bulk contaminated material comes out first. Furniture, mattresses, upholstery, bedding, carpet and underlay are assessed individually. Where an item is large but only partly affected — a sofa or mattress is the common case — the crew cuts out and separates the contaminated section rather than manoeuvring a saturated whole item through the building. Removed material goes directly into rated biohazard containers within the containment.

Contents triage is where families feel the loss most sharply, and where an experienced crew earns its reputation. Non-porous items — metal, glass, sealed hard plastics, some finished wood — can often be cleaned and returned. Porous items that have absorbed biological material generally cannot. Documents, photographs, and irreplaceable personal effects sit in a difficult middle ground and should be raised explicitly during the assessment, not discovered in a disposal bin afterward.

6. Structural remediation

Once the contents are out, contaminated building materials are removed: carpet and underlay, laminate and its substrate, affected subfloor sections, baseboard, drywall to a defined height, and insulation where fluid or odour has penetrated. Cuts are planned to a margin beyond confirmed contamination rather than to the visible edge.

This phase is hazardous material removal in the literal sense, and it is where the crossover with a company’s abatement and demolition capability matters. Selective demolition inside an occupied building, without spreading what you are trying to remove, is a specific skill.

7. Cleaning and professional disinfection

With porous materials gone, remaining surfaces are cleaned and disinfected — in that order, and the order is not negotiable. Disinfectants are deactivated by organic soil, so applying product to a surface that still carries residue accomplishes very little. Competent crews work in stages: detergent cleaning to remove the organic load, rinse, then application of an appropriate registered disinfectant.

Professional disinfection hinges on two details amateurs miss. The first is dwell time — the manufacturer-specified period a surface must stay visibly wet for the claimed kill. Wiping a product off after thirty seconds when it requires ten minutes produces a clean-looking, undisinfected surface. The second is product selection matched to the organism, since disinfectant efficacy claims are specific rather than universal.

Surfaces are then re-cleaned to remove chemical residue, and the process is repeated where the assessment calls for it.

8. Odour and residual treatment

Decomposition odour is caused by volatile compounds that have absorbed into materials, which is why masking agents fail and why odour returning after a week is a reliable sign the source was never fully removed. Genuine odour resolution is a source-removal problem first. What remains afterward is addressed with sealing of remediated substrates and appropriate treatment of the air and structure.

9. Regulated waste packaging, transport, and disposal

This stage is invisible to the client and is one of the clearest markers of a legitimate contractor.

Biohazardous waste is packaged in containers appropriate to its classification, labelled, manifested, and taken to a facility licensed to receive it. Where material meets the criteria for Class 6.2, Infectious Substances under Canada’s federal Transportation of Dangerous Goods Regulations, packaging must comply with the CAN/CGSB-43.125 standard covering packaging of Category A and Category B infectious substances and clinical, biomedical, or regulated medical waste. Class 6.2 is divided into Category A and Category B, with Category A representing the higher hazard and each category carrying its own packaging requirements.

Practically, this means a qualified contractor can tell you where your waste went and produce documentation proving it. Urban Environmental publishes its licence to transport hazardous waste on its website, which is the kind of thing worth asking any contractor to show you.

10. Confirmation of cleaning

Professional work ends with verification, not with the crew’s opinion. The industry standard of care here is the ANSI-accredited ANSI/IICRC S540 Standard for Trauma and Crime Scene Cleanup, now in its second edition (2023), which defines the criteria and methodology for inspecting and investigating blood and other potentially infectious material contamination, establishing work plans and procedures, and — as a distinct final component — confirmation of cleaning. The standard assumes throughout that scenes have already been released by law enforcement or regulatory agencies.

Verification may include documented visual inspection under adequate lighting, moisture readings on remediated substrates, ATP or protein residue testing on surfaces, and photographic records from pre-work through completion. The deliverable is a written report, which matters for insurance claims, real estate disclosure, estate administration, and any future dispute.

11. Reconstruction and handoff

Remediation leaves a clean but incomplete space — missing flooring, drywall cut back, subfloor exposed. Reconstruction is a separate scope: replacing structure, finishing, painting, and returning the room to usable condition. Some clients want the same contractor to carry it through; others hand it to their own trades. Clarify which at the estimate stage so there is no gap in expectations.

The regulatory framework in British Columbia

Biohazard remediation in BC sits at the intersection of three regulatory layers, and a contractor who cannot speak to all three is a risk.

Layer Instrument What it governs
Provincial — worker safety WorkSafeBC OHS Regulation, Part 5 (chemical and biological agents) and Part 6 (substance-specific requirements) Written exposure control plans, infection-control precautions, PPE selection, worker training and supervision, the precautionary principle
Federal — transport Transportation of Dangerous Goods Regulations, Class 6.2 Infectious Substances; CAN/CGSB-43.125 packaging standard Classification, packaging, marking, documentation, and training for transporting infectious substances
Industry — standard of care ANSI/IICRC S540 (2nd ed., 2023) Hazard assessment, work plans, biocide technology, structural and contents remediation, waste handling, confirmation of cleaning

Provincial waste-handling requirements and municipal disposal rules apply on top of these, as do occupational hygiene requirements where a project uncovers asbestos, lead, or mould and pulls additional parts of the OHS Regulation into scope. The IICRC standard itself notes that where substances like asbestos, lead, or mould are encountered, additional expertise from indoor environmental professionals may be required.

One practical implication for property owners: if your building predates the 1990s and remediation requires cutting into flooring, walls, or insulation, expect the scope to include hazardous materials testing before demolition. A contractor who proposes cutting drywall in a 1978 house without addressing that is cutting corners you will hear about later.

Who is actually responsible for the cleanup?

This is the question that catches people off guard, so it deserves a direct answer.

Emergency services do not clean. Police secure and investigate. The coroner’s service attends to the deceased. Ambulance crews treat and transport. When their work is finished, the scene is released, and remediation becomes a private responsibility. Urban Environmental’s own crime and trauma scene material makes the same point: after a site is released by the authorities, additional cleanup, decontamination, and odour control may be required that is not the authorities’ responsibility.

Who bears it depends on the situation:

  • Owner-occupied home: the owner, or the estate’s executor if the owner has died.
  • Rental property: typically the landlord, with recovery from the tenancy or estate a separate legal question.
  • Strata: allocation between the strata corporation and the owner depends on where the contamination is and what the bylaws say.
  • Workplace: the employer, who also carries the worker-safety obligation.
  • Vehicle: the owner or their insurer.

Insurance frequently covers biohazard remediation, and many contractors work directly with adjusters. Whether a specific policy responds — and to what limit — is a question for the insurer, not the contractor.

Certified biohazard cleaners versus general cleaning services

Certified biohazard cleaners General cleaning / janitorial
Starting point Documented contamination assessment Visual inspection and hourly quote
Worker protection Written exposure control plan, fitted respiratory protection, decontamination procedures Household gloves; often none
Containment Sealed work area, HEPA filtration, controlled air pressure None
Scope of removal Contaminated structure removed to a margin beyond confirmed spread Surface cleaning only
Disinfection Clean-then-disinfect staging, registered product matched to hazard, observed dwell time Consumer disinfectant, wiped off immediately
Waste handling Rated containers, manifested, licensed transport and disposal Municipal garbage
Verification Documented confirmation of cleaning, written report None
Liability record Photographic and written documentation for insurers and future occupants None

What to expect, and what drives the price

Honest answer: nobody can quote this accurately over the phone, and a contractor who gives you a firm number sight-unseen is guessing.

Duration and cost are driven by:

  • Time elapsed before discovery — the single largest variable in a decomposition scene.
  • Extent of migration into subfloor, wall cavities, and the level below.
  • Porous material volume — carpet and upholstery versus tile and concrete.
  • Structural involvement — whether flooring and drywall must come out.
  • HVAC involvement, which can expand scope dramatically.
  • Secondary hazards — asbestos, vermiculite, mould, pest infestation.
  • Access — third-floor walk-up versus ground-level with parking.
  • Volume of contents requiring triage, particularly in hoarding conditions.

How to vet a biohazard cleanup company: ten questions

Most people hiring this service have never hired it before and are doing so on the worst day of their year. These questions separate qualified contractors from opportunists quickly.

  1. Do you have a written exposure control plan for biological agents, and can I see that one exists? A contractor who does not know what this is should not be on your property.
  2. What certifications do your technicians hold? Ask specifically. IICRC Trauma and Crime Scene Technician certification is the relevant credential; ask which technicians on the crew hold it.
  3. Are you licensed to transport hazardous waste, and where will my waste go? Ask to see the licence and to receive disposal documentation.
  4. Will you provide a written scope and a completion report? Both should be standard.
  5. How will you verify the space is clean? Listen for method — testing, moisture readings, documented inspection — not reassurance.
  6. How will you handle containment and air management? Ask which direction the air moves and why.
  7. What happens if you find asbestos or mould? In older BC housing this is likely, and the answer should be a clear process, not surprise.
  8. What can be salvaged, and how do you handle personal effects? Ask before work starts, not after.
  9. Are you insured and WorkSafeBC-registered, and are your workers covered? Uninsured labour on your property becomes your exposure.
  10. Who is my point of contact for the duration? Continuity matters when the situation is already difficult.

Common mistakes property owners make

Attempting it themselves. Understandable, and the most consequential error on this list. Beyond the exposure risk, DIY attempts routinely spread contamination — a shop vacuum without HEPA filtration aerosolises what it picks up, and cleaning fluid pushed across a floor drives it into seams.

Hiring a general cleaner because they were available sooner. The cost of remediating a job that was done badly the first time exceeds the cost of doing it correctly.

Accepting masked odour as resolved odour. If it smells like fragrance rather than nothing, the source is still there.

Skipping documentation. In BC, material facts about a property can carry disclosure implications on sale, and estates and insurers both ask for records later. Get the completion report.

Delaying the call. Decomposition contamination worsens measurably each day. Every day of delay expands the scope and the invoice.

Ventilating the space by opening everything up. Intuitive and counterproductive: it moves contaminated air into the rest of the building and, in a multi-unit property, into your neighbours’ problem.

Practitioner notes

A few things that experienced crews know and brochures rarely mention.

The nose is a diagnostic tool, not a nuisance. Returning odour after remediation is the field’s most reliable indicator of missed contamination — usually in a wall cavity, under a threshold, or in HVAC ducting.

Concrete is porous. Basement and garage slabs absorb fluid, and a slab that looks cleanable often requires grinding or sealing.

HVAC is the most-missed pathway. If the system ran while the scene was undiscovered, contamination may be distributed through the ductwork of the entire building.

Multi-unit properties need neighbour management. Odour and anxiety both travel. Communicating with adjacent residents early prevents a remediation project from becoming a building-wide dispute.

Insurance timing rewards early photographs. Documentation from before any material is disturbed strengthens a claim considerably.

Frequently asked questions

What does a biohazard cleanup company do?

A biohazard cleanup company assesses biological contamination, isolates the affected area with engineered containment, removes contaminated contents and building materials, cleans and disinfects remaining surfaces to a documented protocol, packages and disposes of the waste through licensed channels, and verifies the space is safe to reoccupy — providing a written report of the work.

Do police or the coroner clean up after a death?

No. Police and the coroner’s service investigate and remove the deceased, then release the scene. Cleaning and decontamination afterward is the responsibility of the property owner, executor, landlord, or employer, who hires a specialist contractor.

Can I clean up blood or a decomposition scene myself?

It is strongly inadvisable. Blood must be treated as infectious regardless of known medical history, contamination usually extends beyond what is visible, household equipment spreads rather than removes biological material, and the waste cannot lawfully go into household garbage.

How long does professional biohazard cleanup take?

It depends on how long the scene went undiscovered, how far contamination migrated, and whether structural materials must be removed. A contained, recent incident on non-porous surfaces is a substantially shorter project than a long-undiscovered unattended death with subfloor involvement. A contractor should give you a duration estimate after an on-site assessment, not before.

Does insurance cover biohazard cleanup?

Often, but coverage varies by policy and situation. Contact your insurer early, photograph everything before anything is disturbed, and ask your remediation contractor whether they work directly with adjusters.

What certifications should a biohazard cleanup company have?

Look for technicians certified to the ANSI/IICRC S540 standard — the Trauma and Crime Scene Technician credential — along with a written biological-agent exposure control plan, WorkSafeBC registration, liability insurance, and licensing to transport hazardous waste.

Will the smell come back?

Not if the source was fully removed. Odour returning after a week means contaminated material remains, most often in a wall cavity, beneath flooring, or in HVAC ducting. Masking agents do not resolve decomposition odour; source removal does.

Can contaminated furniture and belongings be saved?

Some can. Non-porous items — metal, glass, sealed hard surfaces — are frequently cleanable. Porous items that have absorbed biological material usually cannot be salvaged. Raise irreplaceable personal effects during the initial assessment so they can be handled deliberately.

Key takeaways

  • Biohazard cleanup is remediation, not cleaning: assessment, containment, removal, professional disinfection, regulated disposal, and documented verification.
  • Emergency services release a scene; they do not clean it. Responsibility passes to the owner, executor, landlord, or employer.
  • Contamination is almost always larger than it appears, because fluids migrate into subfloor, wall cavities, and the level below.
  • In British Columbia the work is governed by WorkSafeBC exposure control requirements, federal Transportation of Dangerous Goods rules for infectious substances, and the ANSI/IICRC S540 standard of care.
  • Porous materials that have absorbed biological material generally cannot be cleaned and must be removed.
  • Disinfection fails without prior cleaning and without observing the product’s full dwell time.
  • The completion report matters as much as the cleanup — for insurers, estates, and future occupants.
  • Delay increases scope and cost; decomposition contamination worsens daily.

Conclusion

The reason this work is a specialised trade is not that it is unpleasant. It is that it is technical: contamination behaves in ways that are not intuitive, biological hazards are governed by real regulation, and the only meaningful definition of “done” is a documented one. What separates a qualified remediation contractor from anyone willing to show up is the assessment at the start and the verification at the end — everything between those two points is execution.

For anyone standing in the position of that property manager in New Westminster: the situation is manageable, and it is manageable faster than you think. What it requires is one call to a contractor who can explain their containment plan, show you their waste licence, and hand you a report when they leave.

Talk to Urban Environmental

Urban Environmental Ltd. is a hazardous materials removal company headquartered in Maple Ridge, BC, providing bio-hazard cleanup, crime and trauma scene cleanup, and infectious disease control alongside asbestos abatement, mould remediation, and demolition services across Greater Vancouver and the Fraser Valley — including Vancouver, Burnaby, Surrey, Richmond, New Westminster, Coquitlam, Langley, Delta, North and West Vancouver, Abbotsford, Chilliwack, and Mission.

If you are dealing with a biohazard situation now, call 604-299-0379 to speak with the Urban Environmental cleanup specialists, or request a quote through the website. If you manage property, hold an estate, or run a facility, the better time to have this conversation is before you need it.

Who Cleans Up a Crime Scene After the Police Leave?

When a crime or a traumatic death happens in a home or business, the arrival of police, paramedics, and investigators is only the first chapter. Once the scene is documented and released, everyone leaves — and the property is handed back to its owner or the victim’s family, often exactly as the incident left it. In that moment, one difficult and surprising question tends to surface: who cleans up a crime scene after the police leave?

The short answer catches most people off guard. This guide explains who is actually responsible, what the authorities do and don’t handle, why crime and trauma scene cleanup is not a job for family or building staff, and how the costs are typically covered in British Columbia. It is written to be practical and clear at a time when clarity is hard to come by. Please note that it is general information, not legal or insurance advice.

Who cleans up a crime scene? The short answer

Police, paramedics, and coroners do not clean up crime or trauma scenes. Their role is to respond, investigate, and document. Once a scene is released, responsibility for cleanup and decontamination falls to the property owner, the occupant, or the deceased’s family or estate — not to any government agency. Because these scenes involve blood and other biohazards, that responsibility is almost always passed to a licensed professional crime scene cleanup company with the training, equipment, and legal authorization to remove biohazardous material safely. In other words, the people left to arrange cleanup are usually the ones least prepared for it — which is precisely why professional help exists.

What the police and authorities actually do — and don’t

It is a common and completely understandable assumption that if the police attend a scene, someone official handles the aftermath. In reality, each responder has a narrow role:

  • Police and investigators secure the scene, gather evidence, and document what happened.
  • Paramedics and medical staff treat and transport the injured.
  • The coroner or medical examiner attends in the case of a death and arranges removal of the deceased.

Once these tasks are complete and the scene is formally released, the property is returned to the owner or family. Cleaning, decontaminating, and restoring it is not part of any of these agencies’ responsibilities. That work — and its cost — sits with whoever owns or is responsible for the property.

So who is responsible for the cleanup?

Responsibility depends on the property and the situation, but it generally falls to one of the following:

  • Homeowners — a homeowner (or their family) is responsible for cleanup of their own residence.
  • Family or estate of the deceased — after a death at home, responsibility commonly falls to the next of kin or the estate.
  • Landlords and property managers — for a rental, the property owner is typically responsible for restoring the unit, though specifics can depend on the tenancy agreement and circumstances.
  • Business owners — commercial property owners are responsible for their premises, with the added duty of protecting employees from exposure.

No matter who holds responsibility, the safe and practical path is the same: bring in professionals rather than attempting it in-house.

Why crime and trauma scene cleanup is never a DIY job

It is natural to want to spare the family a cost, or to simply “handle it.” But crime and trauma scenes are among the most hazardous cleanup jobs there are, for reasons that are not obvious at first glance.

Blood and bodily fluids can carry bloodborne pathogens such as hepatitis and other infectious agents, and contamination spreads far beyond what the eye can see — into flooring, subfloor, drywall, and other porous materials. Ordinary household cleaners do not disinfect to the required standard, and improper handling can expose people to infection or spread contamination through the rest of the property. There is also the matter of the residues investigators leave behind — fingerprint powder, luminol, and sometimes tear gas — which carry their own hazards and can damage belongings.

Finally, biohazardous waste cannot simply be bagged and put in the trash. It must be contained, transported, and disposed of in accordance with provincial and federal regulations, by a company licensed to transport hazardous waste. Doing this incorrectly is both unsafe and unlawful. Professional crime scene cleanup exists precisely because the work demands training, protective equipment, proper disinfectants, and legal authorization that households and building staff simply do not have.

Who pays for crime scene cleanup in BC?

Cost is understandably one of the first worries, and the reassuring news is that families are often not left to shoulder it alone.

Insurance. Many homeowner’s and property insurance policies include coverage for biohazard or trauma cleanup, though the amount and conditions vary by policy. A reputable cleanup company can usually work directly with insurers and help document the claim.

Victim assistance. British Columbia operates programs intended to help victims of crime with certain costs, which in some circumstances may extend to cleanup. Eligibility and coverage are specific and change over time.

Because coverage differs case by case, the practical first step is to contact a professional cleanup company early — they handle these situations regularly and can explain the likely options for your circumstances. Again, this is general information, not insurance or legal advice.

What professional cleanup actually involves

A qualified crime and trauma scene cleanup company follows a formal, staged process rather than simply “cleaning.” At Urban Environmental, that means containment of the affected area; methodical cleaning and disinfection in stages using field-tested agents; and the detection, disinfection, and complete removal of all traces of biohazardous material and infectious waste — including tissue, bodily fluids, contaminated household goods, and sharps such as needles or razor blades. All biohazard waste is then packaged and removed in accordance with provincial and federal regulations. The goal is not only a clean property, but one restored to its original condition — safely and discreetly.

How to choose a crime scene cleanup company

Because this is a service most people hire only once, and under stress, it is worth knowing what separates a legitimate company from the rest:

  • Proper licensing to transport and dispose of hazardous waste
  • WorkSafeBC (WCB) clearance and liability insurance
  • Trained technicians and a documented containment-and-disinfection process
  • Discretion, compassion, and rapid response
  • Willingness to work with your insurer

Urban Environmental meets each of these. We are WCB-cleared, insured, and licensed to transport hazardous waste, and we serve homes and businesses across Metro Vancouver, the Fraser Valley, and the wider Lower Mainland with technicians who can be on site as quickly as you need them.

Frequently asked questions

Do the police clean up a crime scene?

No. Police, paramedics, and the coroner respond to, investigate, and document a scene, and arrange removal of the deceased — but cleanup and decontamination are not their responsibility. Once the scene is released, that falls to the property owner or family.

Who is responsible for cleaning up after a death at home?

Responsibility generally falls to the homeowner, or to the next of kin or estate of the deceased. For rentals, it typically falls to the property owner. In practice, a licensed biohazard cleanup company is hired to do the work safely.

Can I clean up a trauma scene myself?

It is strongly discouraged. Blood and bodily fluids can carry infectious pathogens, contamination spreads into hidden materials, and biohazard waste must be disposed of legally by a licensed company. It is a health and legal risk, not merely an unpleasant task.

Does insurance cover crime scene cleanup?

Many home and property policies include some biohazard or trauma cleanup coverage, though this varies by policy. A professional company can often bill insurers directly and help with the claim.

How quickly can cleanup begin?

Once the authorities have released the scene, a professional company can usually respond quickly. Urban Environmental can have technicians on site across the Lower Mainland as fast as you need them.

Key takeaways

  • Police, paramedics, and coroners do not clean up crime or trauma scenes — they respond, investigate, and remove the deceased.
  • Once a scene is released, cleanup responsibility falls to the property owner, occupant, or the deceased’s family or estate.
  • It is not a DIY job: biohazards, hidden contamination, investigator residues, and strict waste-disposal laws make professional cleanup essential.
  • Costs are often covered, at least in part, by home or property insurance and possibly victim-assistance programs — confirm the specifics for your situation.
  • Choose a company that is licensed for hazardous waste, WCB-cleared, insured, and discreet.

We’re here when you need us

Facing the aftermath of a crime or traumatic loss is one of the hardest things a family or business can go through, and arranging cleanup should not add to the burden. Urban Environmental has long been a trusted name in crime and trauma scene cleanup across Vancouver and the Lower Mainland, handling every job with thoroughness, discretion, and care. If you need help, call us at 604-299-0379 or request a quotation — technicians can be on site as quickly as you need them.

Why Bathroom Mould Keeps Coming Back in BC Homes

This tale begins with a shadow-like substance (smudges) at the corner of your bathtub, darkening (blooming) the grout line and/or appearing behind the toilet (dark patch). After scrubbing it off using bleach and elbow grease, you are probably patting yourself on the back, but then you notice the dark patch is back and has grown even darker/bolder and appears angrier.

Is this scenario familiar to you as a homeowner in British Columbia? If so, the coastal, rainy conditions here not only affect the outdoor spaces that we see, but they also affect what lives inside your walls. Bathroom mould is more than an eyesore; it is an ongoing problem that has a very particular history that cannot be altered by merely scrubbing the surface.

Why does bathroom mould remediation continue to thrive in BC homes? Let’s peel back the curtain and find out.

BC’s Climate: A Love Letter to Mould Spores

British Columbia is a very beautiful province, but it is also extremely humid. The weather can be rainy in the Lower Mainland and very misty in the Interior region. So, it’s fair to say that moisture is an integral part of life for most homeowners in British Columbia. The other thing about living in such a humid climate is that it creates a perfect environment for mould spores to grow.

Mould spores exist all throughout your home. There are always mould spores present in the air that you breathe, just waiting for the right conditions (warmth, darkness and moisture) to grow. Your bathroom provides all three of these things every day. After taking a hot shower (which could last well over 10 minutes), the humidity levels in a closed bathroom could reach over 90%. Without adequate humidity control, that water vapour doesn’t completely evaporate or disappear; instead, it settles into all the porous materials (grout, caulking, drywall, and ceiling material) found in your bathroom, thus providing an ideal breeding ground for mould to establish itself permanently.

The Real Culprit: Moisture Intrusion You Can’t Always See

The mold on the surface of walls is one of the indicators you have mold growing within your walls due to excess moisture.

For many homes in BC — especially older homes — the causes of mold problems extend beyond just the tile or grout you can see.

Aging caulk allows water to seep through and accumulate behind the walls or under the flooring and accumulate. Although you clean the visible mold from the surface, there are moisture sources hidden inside your walls that continue to feed the mold network you never knew existed.

That’s why mold is so frustratingly persistent; homeowners focus on fixing what they can see — such as black rings around the faucet base, and grey fuzz along the ceiling — and not the moisture source.

It’s like mopping up a puddle without fixing the leak above.

Moisture intrusion can come from a variety of sources: unsealed shower pans, slow drips behind vanities, condensation from uninsulated exterior walls, or underground moisture from receding ground or from rising damp.

With the rainfall and moisture we have experienced in parts of British Columbia, the sources multiply. Trying to identify what is causing the problem without the assistance of a professional is tantamount to solving a mystery with only half of the clues available.

Ventilation Issues: The Silent Accomplice

When was the last time you checked to see if your bathroom fan actually works? In British Columbia, many homeowners overlook the role of ventilation in their bathrooms when they think of the reasons for mould to grow in that area. Older homes were often constructed without compliant exhaust systems, or the fans vent upwards into the attic instead of outside. This is a very common code violation.

For homes that do have exhaust fans, they may not be adequate for the size of the bathroom, or may have blocked or loose ductwork after many years of use. Hot air from showers or baths, that does not have a way to escape, stays inside of the bathroom, condenses on cold surfaces like tile, mirrors, and walls; causes the drywall on the ceiling to become saturated, and eventually penetrates into the structure of the home. Over time, with ventilation issues in place for your bathrooms, they can act as a breeding ground for mould — and no product you could buy will provide a solution to air being unable to flow. Improving ventilation is the simple answer, but upgrading appliances, ensuring ductwork is properly sealed, and verifying that airflow is compliant with the BC Building Code requires a skilled tradesperson — especially with the complexity of most of the older homes in British Columbia.

Why DIY Solutions Keep Failing

Spraying bleach. Using tea tree oil. Getting a grout pen. Making “mould-resistant” paint. All recently tried by B.C homeowners; however, none of these products were able to eliminate the source(s) of mould. In fact, some D.I.Y. techniques may even create additional problems (i.e., painting over mould would trap spores in walls, repeated applications of bleach would wear down caulking and grout thus increasing the number of cracks/crevice the moisture could get through).

Mould remediation (in bathrooms) is far more than just cleaning up a mess; it’s a comprehensive process that requires identifying all sources of moisture, assessing any damage to the structure caused by mould and cleaning all materials that have been in contact with the mould. If all of these parts are not completed then mould will continue returning because of the same conditions that created it have never been corrected.

What Proper Bathroom Mould Remediation Actually Looks Like

This is where Urban Environmental comes in. Urban Environmental provides expertise in bathroom mould removal in BC homeowners that is dependable and permanent, rather than just a temporary measure. A Certified Remediation Specialist does not simply treat surface-level areas; he/she will perform detailed moisture assessments utilizing state-of-the-art equipment, such as thermal imaging cameras and moisture meters, to identify hidden damp conditions inside walls, floors and ceilings. Remediation specialists will find the source of water intrusion and eliminate it. Once this has been accomplished, they will safely remove all moldy materials from the property. Following this, they will provide clear and practical recommendations about moisture control and ventilation methods to help ensure that mold does not return.

The Urban Environmental approach is based on the understanding of how mold affects not only the structural integrity of buildings, but also how it affects the health of individuals. Mold exposure is known to cause respiratory distress, to aggravate allergies, as well as to cause more serious health issues for susceptible individuals. Given the damp environment of BC’s bathrooms, mold remediation is not an optional expenditure, but rather an essential long-term commitment to securing your home and improving the quality of life for your family.

Breaking the Cycle for Good

Living in beautiful British Columbia should not mean a constant battle with recurring mould problems . Your bathroom mould has more meaning than just being mould — it’s a message for you to understand the problem with moisture, airflow, and the hidden weaknesses of your home’s struc ture. By paying attention to this message you can seek professional help from someone who knows how to diagnose and fix your problem correctly.

Urban Environmental will help BC home owners to break out of the cycle of mould, because bathrooms are meant to be a safe refuge, not an incubator of mould spores. Call today for a professional evaluation, and leave the unwanted guest a message telling it to leave for good.

Why Asbestos Testing is Essential Before Any Home Renovation: Protect Your Health and Property

Remodeling your home is a very exciting process, but like with any large undertaking, you should take some precautions when it comes to making sure that the process is safe for your home and your family. Whether you are hiring professionals or doing it yourself, there is always the importance of clearing your house of potential hazards.

Most of us have at least heard of asbestos and been informed it is dangerous to humans with exposure over time. But what is asbestos, and how do you make sure it won’t affect your remodel?

Continue reading to find out more about asbestos and the advantages of asbestos testing services.

What Is Asbestos and Why Is It a Problem?

Asbestos is, of course, a naturally occurring mineral, but it was used, not so long ago, for this purpose because of its durability and fire-resistant properties. For many decades, asbestos was used in everything-from insulation and flooring tiles, roofing shingles, and even siding. The crux of the matter, however, is that whereas asbestos was the favored construction material then, we now know that exposure to its fibers leads to serious health issues.

Why Should You Worry About Asbestos?

Yes, if your home was built before the 1980s, chances are that it contains asbestos in one form or another. As long as these materials remain sealed and undisturbed, they pose little to no risk. On the other hand, during renovation when there is tearing out or alteration of walls, ceilings, or floors, then you stand a possible chance of disturbing these very same substances, thus setting free dangerous fibers into the air.

Why is Asbestos Dangerous?

The dangers of asbestos on human health cannot be overstated. When disturbed, asbestos fibers easily go airborne, making it a substance that will reach the lungs or digestive system once ingested. The problems that it has been proven to cause when exposed for a long period will include:

  1. Mesothelioma : Mesothelioma is a cancerous condition that affects the pleura, the lining surrounding the lungs, and the peritoneum, the lining surrounding the lower digestive tract. Asbestos makes it almost exclusive and by the time mesothelioma diagnosis is made, it is nearly always fatal.
  2. Asbestos-related lung cancer : Asbestos-related lung cancer is indistinguishable (looks identical to) lung cancer caused by smoking and other causes. There is estimated to be a further lung cancer for every death from mesothelioma.
  3. Asbestosis : Asbestosis is a serious scarring condition of the lung that usually develops after many years of exposure to asbestos. This condition may cause progressive shortness of breath and in severe cases can be fatal.
  4. Pleural thickening : Pleural thickening is usually a disease that develops after severe exposure to asbestos. The pleura lining the lung becomes inflamed and thickened. As it worsens, the lung itself may become compressed, which can lead to shortness of breath and pain in the chest.
  5. Other cancers: There is some evidence of cancers of other body parts, including the gastrointestinal tract, that have been connected with asbestos exposure.

All these are serious Health risks of asbestos during home renovation,, and it’s apparent, therefore why asbestos testing should be done before any renovation.

The Importance of Asbestos Testing Before Renovation

Maintaining the Health

This is mainly due to health issues. Simple operations like drilling, sanding, or demolition during building renovation can easily introduce asbestos fibers into the air; micro-fibers that cannot be seen-in many cases you and your family may not even realize it until it’s too late. So if you have an old home, then you definitely need to seek specialized asbestos testing services at your place of residence to ensure there is no presence of such hazardous materials at your place. It is a small price to pay for avoiding a risk of severe health conditions in the future.

Avoiding Judicial Complexity and Financial Losses

Frankly speaking, redevelopments may already be stressful when it comes to money. Now, though, to enter a project without sufficient asbestos testing may open a Pandora’s box of legal and financial distress. If the asbestos has been disturbed and not contained correctly, there could be heavy fines or suits against one, especially if it affects others. Other than that, where one is told that one has compromised the safety of one’s home, there may be costly remediation bills that appear out of the blue.

Asbestos testing services help avoid expensive mistakes by giving a clear idea of what you are dealing with.

Ensuring a Smooth Renovation Process

Perhaps nothing worse than a kicking start into a home project – major snag down the line. Getting an asbestos test done before starting, though, puts you on the clear. In case you find asbestos, proper remediation will be arranged before getting dirty. This brings both mental peace of mind and also keeps the renovation schedule intact.

Boosting Property Value and Safety

It has not only saved your health but increased the value of your property: In any home buying scenario, it is easier to sell a home that is asbestos-free. Potential buyers are likely to buy houses that have undergone tests and been cleared for hazardous materials. However, if your house exhibits signs of having asbestos, it will deter would-be buyers or lessen your selling price.

And who would not feel safe and cleaned staying in a place? If you know that your home has no asbestos, it can turn to be like a sanctuary for you.

What to do if you suspect asbestos in your house

If you suspect that your house contains asbestos, don’t be alarmed! Here’s a fun little guide to help you navigate the whole process:

Considering the Source

Asbestos is only harmful if it deteriorates and creates dust that contains microscopic asbestos particles. Many products in your home contain asbestos, including floor tiles, insulating wraps on hot water pipes, and the insulating wraps used on many water heaters. Most automotive brake pads also contain asbestos, as do many other commonly used products. If those products are in good condition, the asbestos they contain poses no harm.

Contain / Cover-up.

If materials are only somewhat damaged, you can rectify it by either limiting access to the surrounding area or fully enclosing it. This may be done by covering it up or containing it. If you discover asbestos in vinyl floor tiles, you should cover them with wood or carpet. The same applies for insulated pipes with asbestos; you can contain it using a protective sleeve or cover.

Check the Age of Your Insulation

The most common source of asbestos exposure is the older insulation, which is usually asbestos because of its resistance to heat and gives good insulation for homes. It is quite common that houses built during the middle century are likely to have insulation that contained asbestos. As of ComfyLiving, it is estimated that half of US homes were built prior to 1980. If your home is old, you’re likely to have asbestos in the insulation installed in it. You can pay a crew to remove the asbestos and replace it with newer insulation that doesn’t contain asbestos.

Seal Suspected Asbestos

If you think that you might have insulation or other products in your house which contain asbestos, one provisional fix is to seal off the suspected source. You can spray over the suspected insulation and other items a spray of water to limit the dust that they may create. You also could seal off the supposed asbestos source using sheets of rolled plastic while you wait for the professionals to amend the problem.

Hire a Professional Asbestos Service

The best option to deal with unwanted asbestos in your home is to hire a properly trained and equipped asbestos removal team. The team will have hazmat suits, respirators, and the equipment needed to contain and remove items likely to contain asbestos. The team can also dispose of contaminated materials safely and permanently.

Making the Right Choices for Your Renovation

When planning your home renovation, keep the following tips in mind:

  1. Start With Asbestos Testing : Asbestos Test Test for asbestos before demolition or remodeling. This is the first step that pays off in terms of safety and peace of mind.
  2. Use Professional Services : Engage services from professionals with competency and experience in the field of testing for asbestos. This way, you will be assured that testing and remediation are made safely and effectively.
  3. Risks and Regulations : Learn about the dangers of asbestos in your community and local regulations regarding handling and disposal. Education is a very important component of your safety and compliance.
  4. Communicate When You Are Renovating : If you’re hiring contractors, discuss your concerns about asbestos. Open communication will ensure that everyone’s perception of safety measures is all aligned.
  5. Consider an Asbestos Management Plan : For old homes, you could consider preparing an asbestos management plan that details where and what is present – asbestos materials. This would prove very helpful as a ready reference for contractors and the eventual homeowner.

In Conclusion: Don’t Skip Asbestos Testing!

In fact, it is advisable to discover the dangers of asbestos in an older home prior to embarking on renovation. Investment in asbestos testing before renovation saves you not only your health but your property and your peace of mind.

Remodeling should be fun: the opportunity to make your house yours. Don’t let fear of unknown dangers dampen that excitement! Let us take that burden from you. Contact Us today for professional asbestos testing Services, and allow us to take the guesswork out of this very necessary process so that you may focus on what matters most-you can make your house into a home.

Thanks for joining me on this asbestos adventure today! All the best with the renovations and remember: knowledge is power when it comes to protecting your wellbeing.

Asbestos in Flooring: How to Detect It and Why Professional Removal is Essential in Vancouver

Asbestos in Flooring: How to Detect It and Why Professional Removal is Essential in Vancouver

It is for all you homeowners or renters of Vancouver! If you read this, you are probably interesting in a pretty unappetizing matter: asbestos in flooring. It is a word that’s somewhat ominous, so don’t worry! We break it down for you in simple words.

Asbestos is a mineral, occurring naturally, which was widely applied in construction materials because of their fire retardant properties and inexpensiveness. You may find asbestos dust sitting anywhere in your home, from the ceiling coatings to boiler flue pipes or ducts, and even floor tiles and cement panels, among many other protective materials in fire protection. Though it was commended for its durability and heat resistance, health risks because of the exposure to it have made it lose the good books in new constructions. If your house was constructed before the years 1990, good chances are that some of these materials may still be present in a building, especially on the flooring.

However, if the asbestos-containing materials are damaged or deteriorated, those tiny fibres can enter the air. The fibers are absolutely invisible to the naked eye. Inhaling fibres over long periods of time leads to severe health issues such as lung cancer and mesothelioma. This is why it’s essential you learn how to identify asbestos in your flooring and why you must get professionals if there’s a confirmed existence of this dangerous material. So, let’s learn more about asbestos removal in Vancouver!

What is Asbestos Flooring?

Asbestos was used as a building material before doctors knew the risks for health. Its form resembled fibers, which made it heat-resistant, making it suitable to be used as building insulation. It is until the professionals in 1970 identified the carcinogenic nature of asbestos.

Health Risks of Asbestos

With asbestosis exposures, asbestos fibers often end up lodged in the lungs, causing inflammation in lung tissues. Such exposure to asbestos has been medically linked with the following health problems seriously:

  1. Asbestosis
  2. Chest pain
  3. Coughing
  4. Difficulty in breathing
  5. Mesothelioma
  6. Multiple types of cancer, including lung cancer

The disease occurs only with persons who come into contact with asbestos; not every individual exposed to it. Probability of illness varies with several factors, for example: Does the exposed party have pre-existing conditions? How long would the exposure be? Rate at which asbestos leaks into the air.
If you suspect that you are harboring asbestos in the flooring in your home, you should take immediate steps to confirm it through a lab test. Then you can start taking remediation steps-such as the replacement of flooring material.

How to Detect Asbestos in Your Flooring

Discovering asbestos in your flooring is not exactly the easiest thing to determine at first glance, but there are ways to determine if your home might contain this dangerous material. So here’s a friendly guide to help you through the process:

  1. Age of Your Home: Generally, if your home was built before the 1990s, it is worth checking further.
  2. Identify the flooring material: Vinyl tiles and linoleum are the most common sources of asbestos. If your flooring is installed in a pattern that appears to have been done between the 1970s and 1980s, you should get it checked.
  3. look for any signs of damage. If you have damaged floors made up of asbestos, then it would release asbestos into the air. It would be perfect to check it on cracks, tears, or peeling.
  4. Don’t Mess With It: If you believe that your floor has asbestos, do not disturb it. Disturbing the substance will put dangerous fibers into the air, thus increasing chances of exposure.
  5. Book a Professional Asbestos Inspection Today! A simple way to prove that you have asbestos in your floors is by hiring a professional for asbestos inspection. These experts will find a safe method of taking samples and sending them to a lab for testing.

How to Remove Asbestos Floor Tiles Safely

It is always a good idea to let asbestos flooring removal be carried out by asbestos-abatement professionals. Employees are expected to wear equipment to prevent exposure to asbestos, and even in a controlled operation, they must exercise extra care to prevent the complete fogging of a structure.

In all provinces, the law requires experienced asbestos removal experts in handling asbestos removal in commercial buildings.

Some allow private house owners to take on the task of removing asbestos materials themselves but never encourage DIY removal of asbestos.

Prior to when you remove the asbestos floorings for yourself, you should check with your state and city government on the rules for the removal and disposal of asbestos. You will have to take precautions like these experts in case you are not to risk danger from you or your household.

Why Professional Asbestos Removal is Essential in Vancouver

If your flooring contains asbestos, you would need to seek the services of Vancouver asbestos removal firms. Here’s why:

  1. Expertise and Experience : The professional asbestos removalists have been trained and licensed to execute safe removal practices on asbestos. They are experienced individuals with knowledge to identify asbestos-containing materials (ACMs) and check the level of risk involved. Their expertise guarantees the removal process is executed efficiently and effectively, which reduces the exposure to asbestos.
  2. Safety Protocols : Professionals also observe certain measures that ensure their protection as well as those who happen to be within the premises. Some of these include the use of particular equipment, personal protective equipment, and ensuring the asbestos fibers do not spread. With this in mind, the measures reduce the risk of contamination and exposure as well.
  3. Legal Compliance : Government authorities regulate the handling of asbestos removal, and practicing removalists are aware of the regulations. As such, removal through this professional means happens in a manner that obeys all legal ramifications. It is both a means of health security and a precaution against probable legal wrangles arising from unprofessional methods in handling asbestos.
  4. Proper disposal : Disposal of the asbestos-contaminated products is another very essential component of removal. Professionals, who are well trained, collect the asbestos wastes, and ensure proper disposal in hazardous materials facilities that are fully equipped to handle hazardous wastes; improper waste disposal might cause environmental contamination and increased Health risks of asbestos exposure for the public.

What to Expect During Professional Asbestos Removal

If you decide to go ahead with professional asbestos removal, here’s what you can expect during the process:

  1. Sealing of Contaminated Area Process of Removing Asbestos : One of the most indispensable steps of any asbestos abatement procedure is the complete and thorough sealing of the area that has been contaminated. Asbestos-containing materials are easily disturbed while removing them, and when such disturbance takes place, asbestos fibers can be released into the surrounding air. He should seal off and close the site where asbestos is to be removed using thick, plastic sheets as well as negative HEPA filtration. This sealing process will definitely ensure protection to you and your family while working in that process.
  2. Complete Decontamination of Materials : Once your home is completely sealed, your asbestos abatement contractor will start the careful removal of the asbestos materials from your house. With insulation, flooring, and everything in between, there are numerous potential asbestos contamination sources throughout your house. Once removed from your house, asbestos materials are placed in sealed disposal containers where they must stay during removal from the house.
  3. Thorough Cleaning of the Contaminated Area : Asbestos removal will conclude with a thorough cleaning of any asbestos left on your property. During asbestos removal, your abatement team will use special vacuums, filtration tools, and other cleaners to painstakingly remove any trace of asbestos fibers from your home. After all this, the asbestos contamination will be confirmed to be fully eradicated through the implementation of an air test. You can then go back to your home for your day to day activities.
  4. Occupation: The occupation of the area will then be ensured after a final inspection that will confirm if all the asbestos was removed and that the place is safe for re-occupation.

Conclusion

Asbestos in flooring is a serious concern, but it needn’t give you a panic attack. You can have an understanding of how to detect it and the importance of professional removal to go about preventing more health dangers for you and your loved ones. If you suspect that your flooring contains asbestos, don’t wait around. Schedule a Professional Asbestos Inspection Today!!

Remember, your health and safety are worth it. Let’s keep our beautiful Vancouver homes safe and sound! If you have any questions or need assistance, don’t hesitate to contact me. I’m here to assist you in finding your way through that tough subject with ease. Take care, all!